Chapter 12: The wires return
Time elapsed: 20y
More years have passed, and the electrification of the cities has started again. Learning to use this technology again isn't too surprising, because the tunnel itself uses electricity and everyone from Toria is familiar with it. In addition, the books in the library contain diagrams of how to store and use electricity. This has allowed you to jump ahead without the awkward experimentation of the past that you have read about, such as the man who flew his kite in an electrical storm!
Your Chappe telegraph network now reaches beyond the mountains and across half of the continent. You have discovered that people still live in many of the great cities of the past - as long as the climate was comfortable enough. One of the large cities that survived is called Kago, once known as Chicago. But the cities in the hot desert to the south are long gone. Nobody could live there after the technology to cool the air disappeared.
One abandoned city was called Phoenix, whose name you found interesting. A phoenix was an ancient mythical bird that died and came back to life. If electricity allows air conditioning to come back, could Phoenix be reborn again?
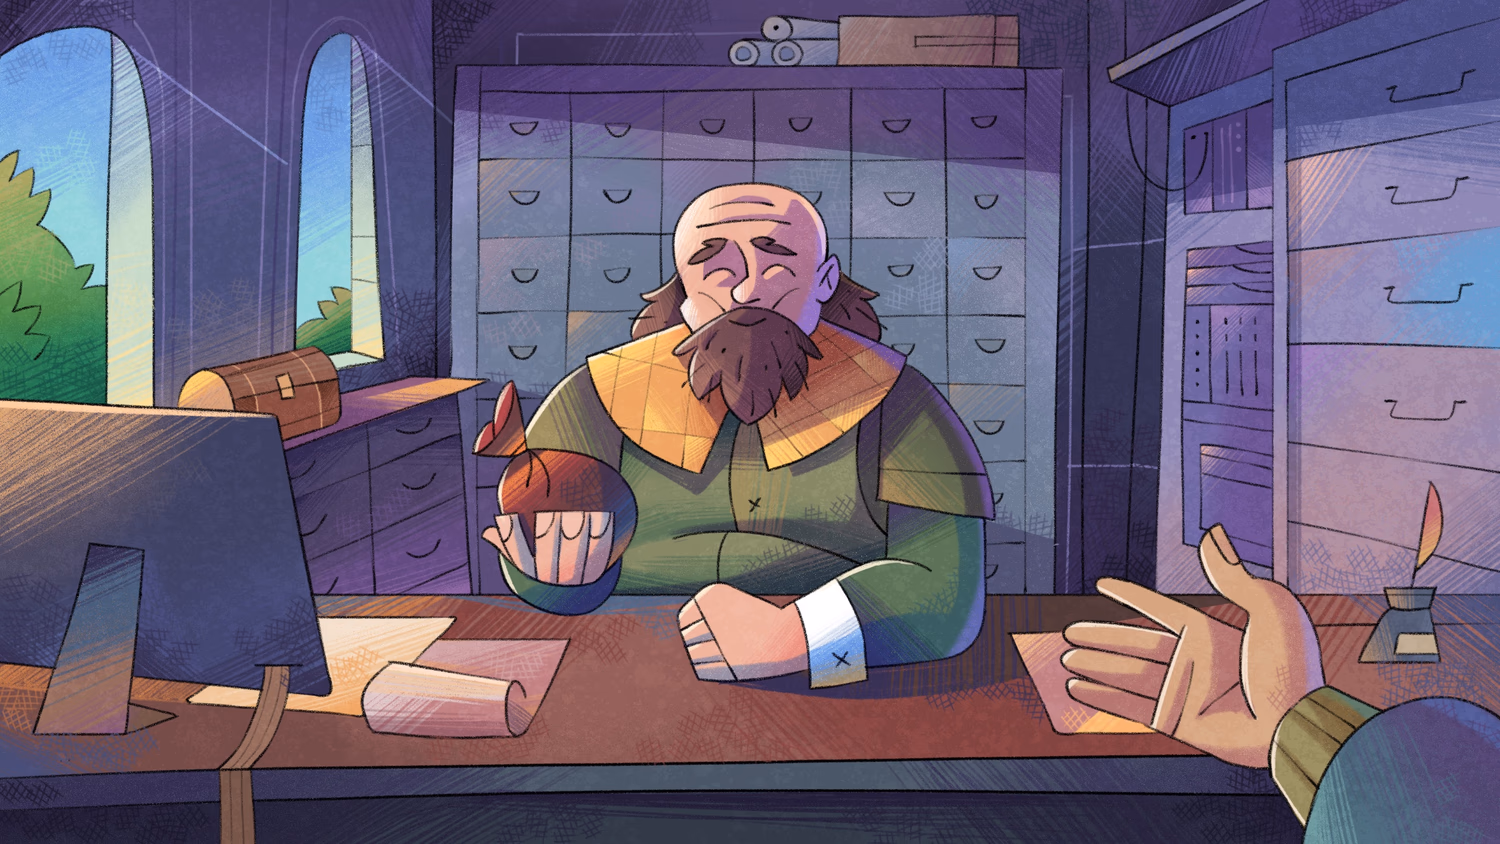
Meanwhile, rediscovering electricity has allowed the electric telegraph to be recreated. This system is both faster and more accurate, and has made it possible to start experimenting with financial transactions. A simple service to send funds has even been set up at the banks!
Landevin spends most of his time exploring the mainland, but has heard about the new financial system and has dropped by to see how it works.
Transactions
Now that we have gotten to the subject of finance, it's time to learn how transactions work.
Why transactions exist
A transaction in a database lets you run a series of statements, and only commit the changes once you are satisfied that they have all run according to plan. Transactions are necessary when actions should either happen together or not at all.
The classic example of a transaction is that of sending money from one person to another. One person should lose their money at the exact same time that the other person receives it.
A transaction is easy enough in the real world, because many actions involve a change in state for both sides. Most importantly, this change happens at exactly the same time.
| Action | One side | Other side |
|---|---|---|
| Eating food | Person: Becomes full | Food: Is deleted |
| Seeing a person | Person 1: Aware of person 2 | Person 2: State changes from "unseen" to "seen" |
| Child is born | Person 1: State changes to "parent" | Person 2: State changes to "born" |
| Passing money to another person | Person 1: Money drops by $10 | Person 2: Money increases by $10 |
None of these changes can happen to only one side - it's always both at the same time.
But in the electronic world it's a bit different. In a database, you could change a person's state from 'hungry' to 'full' but forget to reduce the volume of food by the amount eaten. In real life this would be impossible: you can't eat a cake that still exists after you finish it.
Similarly, what if you increased the amount in one person's account by a thousand dollars before the other account loses it? For a moment, the world itself would have an extra thousand dollars that doesn't actually exist!
So transactions can often be thought of as a way to make sure that changes in a database occur in the same way that they do in the real world.
However, most of the time you don't need a manual transaction. For example, using RELATE to join two records will instantly relate a company to an employee without any extra effort needed. There will never be a situation where a company has hired an employee that is still in an unemployed state.
RELATE company:1->employs->person:1;But something like a money transfer is a different matter. It involves the following:
Person 1 must lose some money,
Person 2 must gain some money.
Here we simply have two actions that need to happen at the same time, but it's not creating a defined relationship between two objects. This is a case where a manual transaction makes sense.
Manual transactions in SurrealDB
Let's imagine that a money transfer needs to take place in Aeon's world. Landevin is helping out at the office today and sees that two new customers called Laurence and Asmodean have been added to the financial system. To add them, we'll just use an INSERT statement to give them a name along with some talers and pennings, the equivalent of dollars and pennies in the current day.
Then a telegram comes in saying that Laurence's balance needs to be reduced by 10. Maybe he withdrew some money? A quick UPDATE will do the trick here.
Landevin then sees that it's 12:00, stands up and goes off to get lunch. When he comes back, he sees the next telegram to take care of: a person named Asmodean Fitch whose balance needs to be increased by 10.
That was easy!
Except that it turns out that the money was meant to be sent because Asmodean had something for sale that Laurance wanted to buy. Laurence saw that his balance had been reduced, but Asmodean didn't see the money come in, and didn't believe that Laurence had actually sent the money. They spent a very uncomfortable lunch hour arguing about it until finally Asmodean got the notice that the money had been sent.
We can fix this with a transaction.
A manual transaction is just a series of statements that starts with BEGIN TRANSACTION (or just BEGIN) and COMMIT TRANSACTION (or just COMMIT). No permanent changes are made until a final COMMIT TRANSACTION statement is used.
The code below shows the same queries we made above, except that the UPDATE statements are now enclosed in a space that begins with BEGIN TRANSACTION and ends with COMMIT TRANSACTION.
The output includes the results of the UPDATE statements, as well as the final query that confirms that both Laurence and Asmodean did indeed see the result they expected.
-------- Query --------

[
  {
    id: person:i9xg3blbhqwfb2l5vqiz,
    name: 'Laurence Molkier',
    pennings: 50,
    talers: 90
  }
]

-------- Query --------

[
  {
    id: person:ucwr3ggkal19tkdskg0e,
    name: 'Asmodean Fitch',
    pennings: 10,
    talers: 210
  }
]

-------- Query --------

[
  {
    name: 'Laurence Molkier',
    talers: 90
  },
  {
    name: 'Asmodean Fitch',
    talers: 210
  }
]
You might decide in the middle of a transaction that you don't want to commit it, in which case a simple CANCEL TRANSACTION will do the job.
So what happens when we choose to CANCEL TRANSACTION instead of COMMIT TRANSACTION? Do the UPDATE queries in the middle of the transaction generate the same output?
Let's give it a try:
They do not! Instead of showing the person records as they would be if the UPDATE had worked, the output only tells us that the query was not executed. No data was ever updated.
-------- Query --------

'The query was not executed due to a cancelled transaction'

-------- Query --------

'The query was not executed due to a cancelled transaction'

-------- Query --------

[
  {
    name: 'Laurence Molkier',
    talers: 100
  },
  {
    name: 'Asmodean Fitch',
    talers: 200
  }
]
If an error takes place anywhere during a transaction, the changes made will be rolled back, just as if you had used CANCEL TRANSACTION. However, we will at least see the reason why the transaction failed. We can demonstrate this by trying to create a record of the transfer, except that it tries to create a datetime from a string that isn't formatted properly.
As a result, the whole transaction is cancelled and our COMMIT TRANSACTION at the end is ignored. The last two responses from the database show what the error is, and that both Laurence and Asmodean have the same amount of money that they had before.
-------- Query --------

"Could not cast into `datetime` using input `'0444:05:07-09:00:00'`"

-------- Query --------

[
  {
    name: 'Laurence Molkier',
    talers: 100
  },
  {
    name: 'Asmodean Fitch',
    talers: 200
  }
]
Instead of using a SELECT statement after the transaction is over, we can also choose to RETURN these values from the transaction. As in most other programming languages, a RETURN statement causes an early break while returning the value that follows it.
The final output shows that Landevin's attempt to create the record best:employee did not work, as the RETURN statement ended and committed the transaction before that line.
-------- Query --------

'10 talers sent from Laurence Molkier to Asmodean Fitch'
So what if we want to cancel a transaction if some condition is true? Do we use an IF ELSE statement that includes CANCEL TRANSACTION for one case and COMMIT TRANSACTION for the other? The answer is no, and the code below won't even execute.
/**
[test]

[[test.results]]
value = "NONE"

[[test.results]]
value = "'Missing COMMIT statement'"

[[test.results]]
value = "'Missing COMMIT statement'"

*/

BEGIN;
LET $money = 100;
IF $money != 100 {
    CANCEL;
} ELSE {
    COMMIT;
}
But there is another keyword that will do the trick!
IF THEN + THROW to cancel a transaction
The output from the last few failed examples shows that changes inside a failed transaction are hidden:
'The query was not executed due to a cancelled transaction'But actual errors do contain information about the operation that was attempted.
"Expected a datetime but cannot convert '2734:05:07-09:00:00' into a datetime"The THROW keyword that we learned in the last chapter is followed by a value representing the error, which is why it can be used to manually cancel a transaction based on a condition. The example below is similar to the previous one, except that:
Instead of using
ONLYandLIMIT 1, the transaction uses twoSELECTstatements to create a$senderand$receiverand then throws an error if the number of records returned is not equal to one.Two people named Aeon have been created by mistake.
Adding a SELECT * FROM person to the end will show that the transfer of funds has indeed worked.
But if you change the line that selects the $sender to Aeon...
LET $sender = SELECT * FROM person WHERE name = "Aeon";Then you will see this error:
"An error occurred: Tried to find single sender and receiver
but found `[{ id: person:opa0onn4skq896pycvxa, name: 'Aeon', pennings: 0, talers: 20000 }, { id: person:zp3ugutklrxocaazx7qx, name: 'Aeon', pennings: 0, talers: 20000 }]`
for sender and `[{ id: person:4i8uurtz6xxok74enu2d, name: 'Asmodean Fitch', pennings: 10, talers: 200 }]` for receiver"
As you can see, individual statements inside a failed transaction always turn to 'The query was not executed due to a cancelled transaction', but automatic errors and THROW statements can contain extra information on what was attempted.
What CANCEL TRANSACTION is useful for
At this point, you might be wondering what the use is of CANCEL TRANSACTION if it can't be used dynamically like inside an IF ELSE statement. One of the best uses for this statement is in testing on existing data, if the test requires a change of state. Take the following two transactions for example that test is to see if a certain person record can be created in a former schema of ours that used this statement to ensure that names are composed of alphabetic characters.
DEFINE FIELD name ON person ASSERT $value.replace(' ', '').replace('-', '').is_alpha();The first transaction will fail with a good error message showing why, while the second fails with a 'The query was not executed due to a cancelled transaction', which is the message that indicates a successful test! Any tests used in this way should expect to see exactly this message in case of success, and some other error message in case of failure.
BEGIN TRANSACTION;
CREATE person SET name = "888";
CANCEL TRANSACTION;

BEGIN TRANSACTION;
CREATE person SET name = "Alucard";
CANCEL TRANSACTION;
-------- Query --------
"Found '888' for field `name`, with record `person:s22fgj8mdoj3yzpcv0he`, but field must conform to: $value.replace(' ', '').replace('-', '').is_alpha()"
-------- Query --------
'The query was not executed due to a cancelled transaction'Now it's time for an interesting fact.
Everything in SurrealDB is a transaction
That's right, every statement in SurrealDB is a transaction! This is a design decision to ensure that data will never show up in a half-written state, or in the process of being committed. So you can think of BEGIN TRANSACTION as a manual way of doing a transaction over multiple statements as opposed to SurrealDB's default method of carrying out transactions unseen to you. In either case, a transaction is always being done.
As the documentation states:
Each statement within SurrealDB is run within its own transaction by default. If a set of changes need to be made together, then groups of statements can be run together as a single transaction. If all of the statements within a transaction succeed, and the transaction is successful, then all of the data modifications made during the transaction are committed and become a permanent part of the database.
Changefeeds and the SHOW statement
Sending money from one person to another is an operation you always want to get right. But in addition to accuracy, you probably also want to keep an eye on activity as it happens to ensure that nothing unexpected is going on. Being able to replay past events is a large help when auditing.
SurrealDB has a built-in feature called a changefeed that is designed for exactly these purposes. Let's give it a try so that Aeon and Landevin can keep an extra close eye on what is happening.
One nice thing about a changefeed is how easy it is to set up: all you have to do is add the word CHANGEFEED and a duration after a DEFINE TABLE or DEFINE DATABASE statement. Let's give that a try with the person table as well as another bank table. We'll give them a changefeed of three days in length.
Then we'll carry out a similar transaction as before.
And now it's time to take a look at the changes! This can be done with a SHOW CHANGES FOR TABLE statement. This must be followed with SINCE, which can take either a datetime or a version stamp.
You can also follow this with LIMIT to set a maximum number of changes to display.
In our case, the SHOW CHANGES query will look like this.
[
	{
		changes: [
			{
				define_table: {
					changefeed: {
						expiry: 3d,
						original: false
					},
					drop: false,
					id: 0,
					kind: {
						kind: 'ANY'
					},
					name: 'person',
					permissions: {
						create: false,
						delete: false,
						select: false,
						update: false
					},
					schemafull: false
				}
			}
		],
		versionstamp: 116638817320173568
	},
	{
		changes: [
			{
				update: {
					id: person:laurence,
					name: 'Laurence Molkier',
					pennings: 50,
					talers: 100
				}
			}
		],
		versionstamp: 116638817320239104
	},
	{
		changes: [
			{
				update: {
					id: person:asmodean,
					name: 'Asmodean Fitch',
					pennings: 10,
					talers: 200
				}
			}
		],
		versionstamp: 116638817320239105
	},
	{
		changes: [
			{
				update: {
					id: person:laurence,
					name: 'Laurence Molkier',
					pennings: 50,
					talers: 90
				}
			},
			{
				update: {
					id: person:asmodean,
					name: 'Asmodean Fitch',
					pennings: 10,
					talers: 210
				}
			}
		],
		versionstamp: 116638817320239106
	}
]
You can also include the original record before the change in a changefeed if you like, by adding the two words INCLUDE ORIGINAL:
/**
[test]

[[test.results]]
value = "NONE"

*/

DEFINE TABLE person CHANGEFEED 3d INCLUDE ORIGINAL;
The output is somewhat longer, but has become much easier to follow because you can see what the state of a record was before a change was applied. Here is one part of the output from above that shows how the current (the ORIGINAL) record shows up instead of just the update that was made.
Aeon and Landevin certainly would have preferred to add an INCLUDE ORIGINAL to their changefeed, as it makes it easier to deal with customers who come to them with questions.
{
  changes: [
    {
      current: {
        id: person:laurence,
        name: 'Laurence Molkier',
        pennings: 50,
        talers: 90
      },
      update: [
        {
          op: 'replace',
          path: '/talers',
          value: 100
        }
      ]
    },
    {
      current: {
        id: person:asmodean,
        name: 'Asmodean Fitch',
        pennings: 10,
        talers: 210
      },
      update: [
        {
          op: 'replace',
          path: '/talers',
          value: 200
        }
      ]
    }
  ],
  versionstamp: 116638848767623168
}
You might have noticed that this is the same JSON Patch format that we saw when trying out the RETURN DIFF clause in an UPDATE statement in Chapter 4.
By the way, SurrealDB has two functions that make it easy to work with output like this: value::diff, which takes two values, and value::patch, which takes a value plus an array of objects that represent the patch operations to perform. These functions work on all value types in SurrealDB.
Here is what the output looks like when we take one of the objects from the output above and manually patch it to see what it looks like after the change, followed by the value::diff function to see the difference between the two.
-------- Query --------

{
  id: person:asmodean,
  name: 'Asmodean Fitch',
  pennings: 10,
  talers: 200
}

-------- Query --------

[
  {
    op: 'replace',
    path: '/talers',
    value: 210
  }
]
One other interesting note about changefeeds is that they are implemented across the whole database. Whenever you define a changefeed on a table, you are actually adding it to a single database-wide changefeed that can be viewed table by table.
That also means that you have the option to define a single changefeed across the whole database to track the changes for each and every table you use. To do this, just change DEFINE TABLE table_name CHANGEFEED to DEFINE DATABASE database_name CHANGEFEED.
/**
[test]

[[test.results]]
value = "NONE"

*/

DEFINE DATABASE sandbox CHANGEFEED 3d;
Live queries
One other way to keep an eye on what is going on in your database is by using a live query. These are quite simple to use, because all you need is to add the word LIVE to the front of a SELECT query.
The output for a LIVE SELECT is just a UUID, like u'14c6f317-a145-49a4-9626-b7168d212e5d'. That's the ID for the live query itself. Returning a UUID lets you pass it on elsewhere, such as if you are using an SDK.
But when using Surrealist or the CLI, you don't need to keep track of this ID most of the time because live query tracking is built in.
If you use the CLI after starting a live query, you'll notice that every statement that modifies a record will also include the live query output.
CREATE customer:aeon;
-- [[{ id: customer:aeon }]]
-- { action: 'CREATE', id: u'14c6f317-a145-49a4-9626-b7168d212e5d', result: { id: customer:aeon } }

UPDATE customer:aeon SET talers = 100;
-- [[{ id: customer:aeon, talers: 100 }]]
-- { action: 'UPDATE', id: u'14c6f317-a145-49a4-9626-b7168d212e5d', result: { id: customer:aeon, talers: 100 } }
Inside Surrealist, you'll see a notification pop up when you use a LIVE SELECT asking if you want to view the changes. Clicking on the notification will show a listener icon and nothing else. Now if you click on New query to open a new tab, a query like CREATE customer:aeon will display the results in the original tab that you are now using to listen in to the live changes.
If you don't need a LIVE query any more, you can...kill it. Yes, that is the name of the statement. All this statement takes is the UUID of the live query, after which it will no longer exist.
KILL u'14c6f317-a145-49a4-9626-b7168d212e5d';There are other ways to stay on top of changes in your database, but we'll leave them for the next chapter so that you can take your time to absorb all the new information.
To finish off the chapter, let's take a look at another way to use functions in SurrealDB.
Anonymous functions (closures)
Sometimes you might find yourself defining a function that feels temporary, as opposed to an official database function that shows up inside the INFO FOR DB statement. In this case, you can choose to use a LET statement to create a function that doesn't have a name. Instead, it just gets bound to a parameter.
These functions are known as closures or lambdas in other languages, and in SurrealQL as well they are usually referred to as closures.
To write an anonymous function, use the LET keyword, and then put the arguments between | |. Since we already know how to define functions, this new syntax is easiest to learn by lining it up with DEFINE FUNCTION that we already know.
Both of these will return 18.
In the quiz section of the last chapter, we solved a problem that related to a literal used to hold error data. Here is a similar literal to that.
If we were putting together a complex query that needed to retrieve the error message as a string from this field, we could put a closure together to simplify that part of the query. This closure called $get_message matches on all the possible values of this error field and returns a string.
Here is the closure in practice.
'We need help. We need things to make us go.'The real magic of closures begins, however, when we start to use them inside SurrealDB's built-in functions that take a closure as an argument.
Closures inside functions
SurrealDB has a number of functions for arrays that allow you to perform an operation on each item. Let's take the array::all() and array::any() functions as an example. Without any extra arguments, these will check to see if all or any of the values inside an array are truthy.
They can also take a value to compare against.
Comparing against a single value can be pretty limiting, however. It would be nice if we could give a variable name to each item in the array and then use that to write an expression such as $v > 2 or $item IS NOT NONE.
Using closures, that is exactly what we can do! Let's see if we can use one to check whether all or any of the items in our small array are greater than 1, provided they are numbers. To do that, we can check if it IS NONE or > 1.
It can look somewhat magic to see a closure inside a function, but if we pull it out, we can see that it's just a regular anonymous function like the ones we experimented with above. The parameter name is entirely up to us: $v, $x, $awesome_closure_parameter, or anything else.
Afterwards, the .all() and .any() methods will use the closure on each item as many times as it needs. The code below shows manually what happens when you call .all() and .any(): it checks one item, then the next, then the next, until it can make a decision.
The output for this will end up as [true, false, true].
We can put these together now to show how .all() is simply taking a closure as an argument. The only difference between this an the RETURN statement above is that .all() and .any() will stop the operation early, because .all() knows as soon as it sees the first NONE that the output will be false, and .any() knows as soon as it sees the first number that the output will be true.
LET $checks = |$v| $v IS NONE OR $v > 1;
LET $array = [NONE, 1, 2];
$array.all($checks); -- false
$array.any($checks); -- true
Though it's not likely inside these quick array methods, you can also define the types for the closure arguments. Let's give this a try with another one called .filter() which removes anything from the array if the closure returns false.
Both of these return [0, 2], showing the even numbers inside the array.
Two other very frequent methods for arrays are called .map() and .chain(). Calling .map() lets you perform an operation on each item in an array, while .chain() does the same for a value as a whole. Here are two simple examples of these two methods:
/**
[test]

[[test.results]]
value = "[2, 3, 4]"

[[test.results]]
value = "{ as_string: '9', original: 9 }"

*/

[1,2,3].map(|$num| $num + 1);

9.chain(|$num| {
  original: $num,
  as_string: <string>$num
});-------- Query 1 --------
[ 2, 3, 4 ]
-------- Query 2 --------
{
as_string: '9',
original: 9
}
And here are two more, this time using the dataset from the last chapter. As the name suggests, .chain() is often used at the end of a chain of methods (methods called one after the other).
-------- Query 1 --------

[
  {
    id: town:hz252e0l92i8zmsnbjmd,
    location: (-123.338, 48.481),
    name: 'Toria',
    old_name: 'Victoria',
    population: 7000
  },
  {
    id: town:hejdf64dgr4ifrbll202,
    location: (-113.867, 51.182),
    name: 'Bulton',
    old_name: 'Calgary',
    population: 6000
  }
]

-------- Query 2 --------

[
  {
    location: (-123.338, 48.481),
    name: 'Toria'
  },
  {
    location: (-113.867, 51.182),
    name: 'Bulton'
  }
]
Chaining methods is a fantastic way to work with data that you need to transform step by step while passing the result along each time. The following example shows how in just four lines we can take all the data from our to dataset from the last chapter, filter out every trip except those that take 2 to 3 days, then restructure the data into a new object structure, and finally sort it by travel time (which here is alphabetically the first field in the object).
[
  {
    days: 2.0708363803053396f,
    from: 'The Hill',
    to: 'The Naimo'
  },
  {
    days: 2.2527302879206372f,
    from: 'Grasslands',
    to: 'Southlake'
  },
  {
    days: 2.2527302879206372f,
    from: 'Southlake',
    to: 'Grasslands'
  },
  {
    days: 2.5133565637539164f,
    from: 'Abeston',
    to: 'Gaston'
  },
  {
    days: 2.5133565637539164f,
    from: 'Gaston',
    to: 'Abeston'
  }
]
The next method that we'll look at is called .reduce(). It is similar to .map() in that it processes items in an array, except that each step receives both the accumulated value so far and the current item. To use this function, we tell the database what operation to perform at each step of the way. The output of this operation will be used as the first item for the next step, continuing until there are no items left.
To understand how this works, we'll start with .reduce() on an array with just three numbers. What do you think the output will be?
Since we told it to return the sum of the first item plus the second item, it will do the following:
Step one:
$item1is 1,$item2is 2. Since we told it to sum them, it will pass on 1 + 2: the number 3.Step two:
$item1is the output from the last step: 3. The next item in the array is the last number, which is also 3. Since we told it to sum them, it will pass on 3 + 3: the number 6.
In other words: 1 + 2 + 3 = 6.
Here is another example of .reduce() used on an array of single-letter strings. At each step of the way we tell it to concatenate the string with the previous one.
The output for this will be the string 'emit'.
And if we tell it to add $b + $a instead of $a + $b, it will return the same string reversed: 'time'. Interesting!
One other convenience to the .reduce() function is the ability to add a third parameter, which contains the current index of the operation. Let's give this a try with the previous query, by casting it to a string and adding it to the end.
The output will be 'time012'. Here is what the database does at every step of the way:
'm' + 'e' + '0' = 'me0'
'i' + 'me0' + '1' = 'ime01'
't' + 'ime01' + '2' = 'time012'
Now that we know how to use this function, let's give it a try with something real! In the last chapter, we finished up with a query on a trip that goes from Toria to the town of Hope, returning the information for the last town.
With .reduce(), we can do something similar but better. Instead of just returning the final town, we can pass on an object at each step of the way that contains the information for the trip. Each time it gets passed on, it will update the number of trips and the total distance traveled.
To start, we will pass in an array with the names of each town. We'll then call .map() which will use this name to find the record ID for each town that matches the name.
[
  {
    id: town:14cjwpitzngbtiqr072w,
    location: (-123.338, 48.481),
    name: 'Toria',
    old_name: 'Victoria',
    population: 7000
  },
  {
    id: town:pdsmvh1019t0kb6fvz6u,
    location: (-123.414, 48.688),
    name: 'Black Bay',
    old_name: 'Swartz Bay',
    population: 1100
  },
  -- and so on...
]
So far so good! Now here is the tricky part.
Each item inside the array at this point is a town record, but we want the final input to be an object that contains the total distance and number of trips, like this.
{
  destination: {
    // Final town data
  },
  distance: 660,
  trips: 10
}
This is where having access to the index comes in handy. If the index is 0, we know that this is the first operation and that we will have two town records to work with. We can use these to find the distance between the two via a SELECT statement or a graph query:
// Query on the `to` graph table with two WHERE clauses
SELECT * FROM ONLY to WHERE in = $input1.id AND out = $input2.id LIMIT 1;
// Graph query from a town which then pulls out the first item
$input1->to[WHERE out = $input2.id].first();
The graph query is shorter, so we will go with that.
We can then use the output to pass on an object that contains the trip information and the current town name. If the index is not 0, then the first item will be this object but the second item will be a town record. In that case, the town record information will be inside the destination field for the first item, so the query will be slightly different.
SELECT * FROM ONLY to WHERE in = $input1.destination.id AND out = $input2.id LIMIT 1
LET $trip = $input1.destination->to[WHERE out = $input2.id].first();
All together, that gives us this query.
And here is the output! A journey that takes four trips over a distance of about 225 km, ending up at a town called Hope.
{
  destination: {
    id: town:68ksipekrww1n6esuiid,
    location: (-121.459, 49.388),
    name: 'Hope',
    old_name: 'Hope',
    population: 50
  },
  distance: 225342.9358669583f,
  trips: 4
}
Finally, there is also one more function called .fold() that works in the same way as .reduce(), except that it takes an initial value that is used as the first item inside the first operation. In our case, this function makes our code a bit simpler because the first operation (the one with an $index of 0) can just return this object with one change: setting its destination field to the value of the first town.
If you are up for a challenge, see if you can return more information from the query above. You could try adding the first town to the output as well (start along with destination), or even an array containing information about the terrain at each step of the way. Don't forget that you can always use .chain() at the end to tidy up the output, so it doesn't matter if the object passed on before the end contains fields that you don't want to display at the very end.
That should be enough new information for one chapter! The next chapter will also focus on some similar themes.
Next: Chapter 13...
Wait a second, something is going on in Aeon's part of the world.
What's that on the horizon over there to the west where the great ocean begins? It looks like something is approaching from the sea. Let's see what's going on before we move on to the next chapter.
Later that night
A set of urgent telegrams has suddenly begun arriving from Redmont. A group of unknown ships has suddenly shown up on the horizon, seemingly from another country across the ocean. They are clearly hostile, and have begun setting up a camp to prepare to march on the city.
A chill seizes you. Redmont is only a few days' journey from Toria across the bay. What if they reach here? Will you have to close the security door and lock yourself in? You can't let that happen. You send an urgent communication to the city council to ask them to send help to Redmont as soon as possible.
Practice time
For example, if person:one is no longer employed at a company due to retirement and a lot of other relations need to be changed at the same time: bank account type, status with the government, and so on.
Answer
A transaction generally makes most sense if it is important to have all of a person's status changes happen at the same time.
However, having a number of statements grouped together in a checklist-like form can be convenient. In the example below, three RELATE statements are being used to turn the retiring person:one from a current employee to a former employee, the monthly fee for the bus is reduced, and so on.
BEGIN TRANSACTION;
RELATE company:one->employs->person:one SET status = "Retired";
RELATE bank:one->bank_customer->person:one SET account_type = "Retiree";
RELATE bus_company:one->bus_customer->person:one SET monthly_fee = 20.0;
COMMIT TRANSACTION;
Using a transaction in this case can free up the need to remember which of the RELATE statements failed if one or two of them don't work for some reason. If the transaction doesn't fail, all of the person's changes have been put into place and there is nothing else to think about.
2. Can you call two or more closures together?
Answer
Yes, you can wrap one around the output of another in the same way as SurrealDB's traditional function calling syntax.
Take the following helper closures in the example below. One extracts the table name and id from a record, while another takes an array of up to two strings and creates a record from the last item, followed by the first item.
LET $split = |$record: record| [$record.tb(), $record.id()];
LET $reverse = |$arr: array<string, 2>| type::record($arr[1], $arr[0]);
You can then call $reverse() on the output of $split()...
$reverse($split(person:one));...which turns a person:one to one:person.
Method calling syntax does not (yet!) work for such functions, so the following syntax won't work.
person:one.$split().$reverse(); 3. The following data is divided into planet, star, and moon record types. Using method syntax, how could you combine them into a single array of objects that has the table name as the type and the table id as its name?
Here is the data...
LET $info = [
  {
    id: planet:earth,
    diameter: 12742,
  },
  {
    id: planet:venus,
    diameter: 12104
  },
  {
    id: star:sun,
    diameter: 1392700
  },
  {
    id: moon:titan,
    diameter: 5149
  }
];
...and an example of the desired output.
{
  diameter: 5149,
  name: 'titan',
  type: 'moon'
}
Answer
You can use array::map() to do this, by turning each record into an object with a different structure. The record::tb() and record::id() functions will allow you to get the type of object and its name.
$info.map(|$v| {
    type: $v.id.tb(),
    name: $v.id.id(),
    diameter: $v.diameter
  }
);[
{
diameter: 12742,
name: 'earth',
type: 'planet'
},
{
diameter: 12104,
name: 'venus',
type: 'planet'
},
{
diameter: 1392700,
name: 'sun',
type: 'star'
},
{
diameter: 5149,
name: 'titan',
type: 'moon'
}
]4. How would you sort them by diameter, from largest to smallest?
Answer
Adding .sort() to the end will sort them...
$info.map(|$v| {
      type: $v.id.tb(),
      name: $v.id.id(),
      diameter: $v.diameter })
  .sort();
...after which the array::reverse() function will reverse the order.
$info.map(|$v| {
      type: $v.id.tb(),
      name: $v.id.id(),
      diameter: $v.diameter })
  .sort()
.reverse();[
{
diameter: 1392700,
name: 'sun',
type: 'star'
},
{
diameter: 12742,
name: 'earth',
type: 'planet'
},
{
diameter: 12104,
name: 'venus',
type: 'planet'
},
{
diameter: 5149,
name: 'titan',
type: 'moon'
}
]5. How would you sort them by name instead?
Answer
One way to do it would be to change the name field to something that comes first alphabetically, such as appellation or _name.
$info.map(|$v| {
      type: $v.id.tb(),
      _name: $v.id.id(),
      diameter: $v.diameter })
  .sort();
But the simplest way is probably to just use a SELECT statement followed by an ORDER BY clause!
SELECT * FROM $info.map(|$v| {
      type: $v.id.tb(),
      name: $v.id.id(),
      diameter: $v.diameter })
ORDER BY name;[
{
diameter: 12742,
name: 'earth',
type: 'planet'
},
{
diameter: 1392700,
name: 'sun',
type: 'star'
},
{
diameter: 5149,
name: 'titan',
type: 'moon'
},
{
diameter: 12104,
name: 'venus',
type: 'planet'
}
]