Chapter 8: A nice surprise
Time elapsed: 2w6d
A few days have passed since the incident with Landevin. You are starting to get the hang of graph querying and are excited at the possibilities it might hold. It feels almost organic to have records joined to each other by relations. Just like people in real life! Technology isn't so scary if you remember that it is meant to enhance life, not replace it.
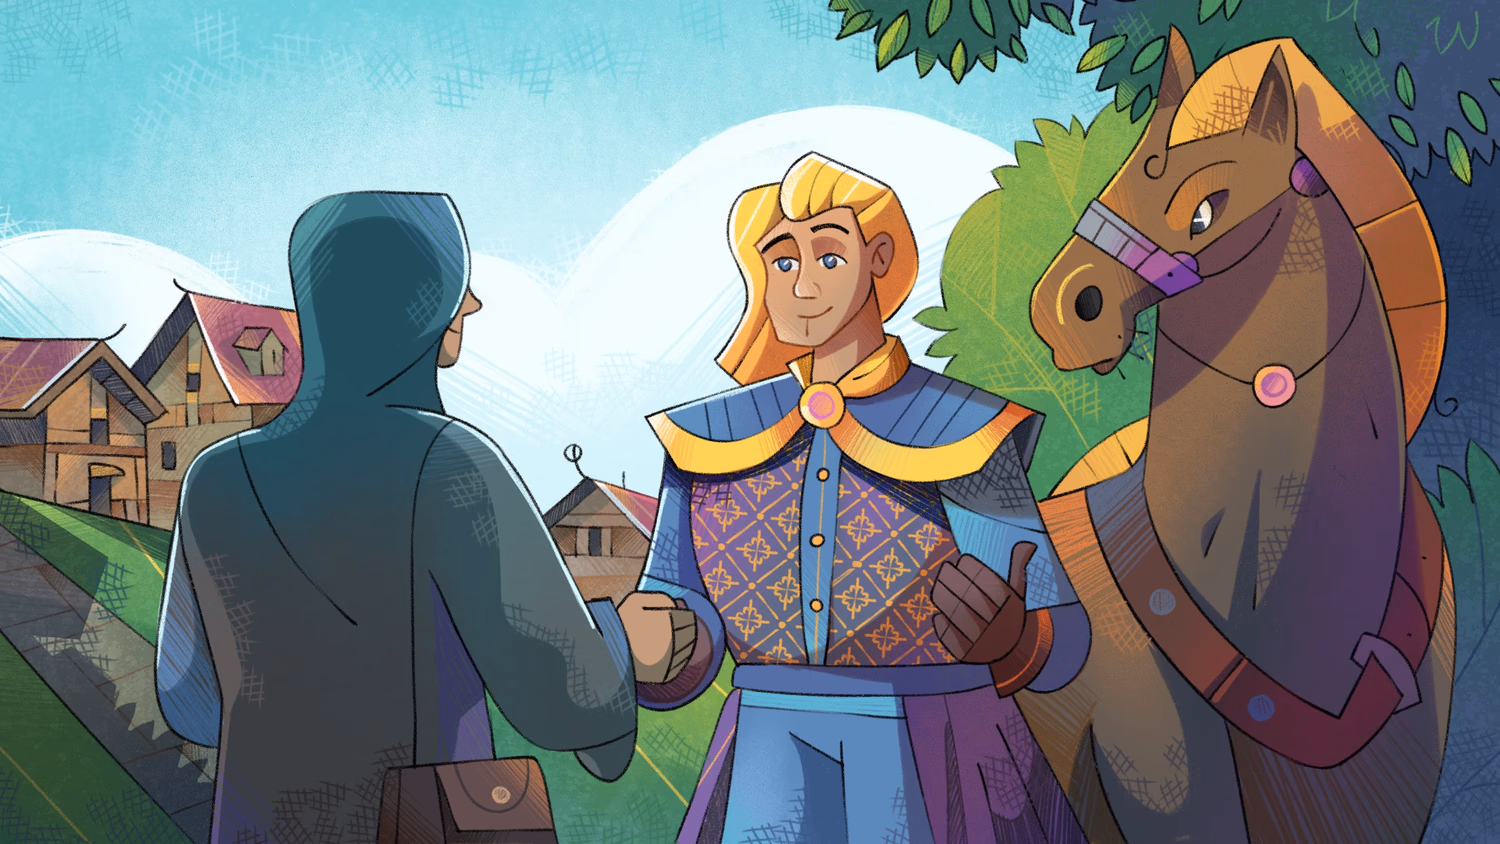
Later in the day you receive a message that there is a visitor at the door. It's Landevin! And he's alone this time.
You leave the tunnel to speak with him, and immediately feel ashamed as you notice the dozen guards standing in his way. You quickly wave the guards away and apologize.
Surprisingly, he smiles. "Think nothing of it, Aeon. We only wanted to raise a few issues, and do not oppose what you are doing here. After returning to Toria, I realised that my speeches had caused too much fear in the people. If I had kept them up, the people might have taken matters into their own hands and destroyed all the good work you've done. I've convinced them that what you are doing is good, and that we just need to be careful. Also..."
"Yes?"
"Well, I can't stop thinking about the knowledge inside the library and what it could do for the world. In fact, I'd like to visit every once in a while and learn the arts of the database. Can you teach me?"
Longer relational queries
There is a little bit left in the story of the enchanted knights that will involve some even more complex relationships, and here is the current dataset as of the end of the last chapter in case you need it.
To prepare for the extra data from the rest of the story, let's learn how to use even longer graph traversal queries than the ones we used in the last chapter.
The next query is twice as long as the graph queries we've used so far. Instead of just following the ->parent_of->person path, it follows it twice! What do you think it will return?
Let's think it through as in the previous chapters.
FROM person: starts with
personrecords,->parent_of: looks for the person at
inofparent_of. That's the parent.->person: of a
personrecord that isout. That'spersonwho "is parented" by another person (a son or daughter)->parent_of: who is also a parent_of...
->person: another person!
In other words, it's trying to find the grandchildren of a grandparent: a person who is a parent_of someone else who is a parent_of another person.
Currently, we don't have any grandparents so the query doesn't return anything in particular besides the path that the database followed.
[
    {
        "->parent_of": {
            "->person": {
                "->parent_of": {
                    "->person": []
                }
            }
        }
    },
    {
        "->parent_of": {
            "->person": {
                "->parent_of": {
                    "->person": []
                }
            }
        }
    },
    // ... and so on ...
]
We can prove that this query is actually doing what we expect it to do by creating a person who is a grandparent. There is no mention of the Nobleman's mother anywhere in the story of the enchanted knights, but he certainly does have a mother. So let's create and then RELATE her as the parent_of the Nobleman.
While we're at it, let's add the AS grandchildren alias to this graph traversal to make the output nicer.
The query now returns some grandchildren! You should see them inside the only person record that is a grandparent, and an empty array for the rest.
[
  {
    grandchildren: [
      person:bertha,
      person:adelaide,
      person:wulfield
    ],
    name: 'Mother of the Nobleman'
  },
  {
    grandchildren: [],
    name: 'The Nobleman'
  },
  {
    grandchildren: [],
    name: 'Wulfield'
  }
    -- ... and so on ...
]
So that means that a query to return both children and grandchildren would look like this.
Recursive queries
The path that we have been using can be extended as far as we like. To see a person's great-great-great-grandchildren, we would use the following path:
SELECT
  ->parent_of->person
  ->parent_of->person
  ->parent_of->person
  ->parent_of->person
  ->parent_of->person AS great_grandchildren
FROM person;
That's quite a bit of typing. Fortunately, SurrealDB has a syntax shortcut that we can use in this case: the recursive operator. To use it, add a .{} after the record and then specify the number of steps inside the {} braces. For person:grandmother, that means that we can add a .{2} after her record ID to go two steps down the ->parent_of-person path.
[
  person:wulfield,
  person:reginald,
  person:adelaide,
  person:bertha
]
This recursive operator will call the part that comes after it as many times as specified.
So what if we want to return the names of these person records instead of the record IDs? In a regular query, we would simply add .name to the end. But if we try to do the same with the above query, it will actually return an empty array!
The problem with the above query is that it is being told to call ->parent_of->person.name twice, but what we want it to do is call ->parent_of->person twice, and then access the name field. To make this work, we can enclose the ->parent_of->person part of the query in parentheses.
[
  'Reginald',
  'Wulfield',
  'Adelaide',
  'Bertha'
]
As with all other queries, you can split queries like this across multiple lines for readability. This can be especially helpful when writing queries that other people will have to read.
RETURN
  person:grandmother
  // Go down two steps
  .{2}
  // Move one step down the family tree each time
  (->parent_of->person)
  // Finally get the names
  .name;
Let's try to move this to a SELECT query so that we can accomplish the query above that returns both the children and grandchildren for the person records. The following query won't quite work, but can you guess why?
The problem is that the . is used to operate on an item that comes before it, and the database isn't sure what item we want to work on.
To let it know, we can add an @ which gives access to the current item in the operation as we first learned back in Chapter 4. In fact, we could also use the id field here too, but @ is used in other places in recursive graph queries so it's good to get into the habit of using it.
By the way, as the first line only goes to a depth of one, it technically doesn't need the recursive syntax and could just be ->parent_of-person. But including it is a nice way to clearly show that one line goes down to a depth of 1 and the next line to a depth of 2, and to cleanly line up these two parts of the query.
As before, don't forget to use parentheses if you are recursing over a depth of more than 1 and want to end a path with a regular non-record ID field like name. This leads to a syntax of:
@to access the current record,.{2}to go follow the path down to a depth of two,(->parent_of->person)to make sure that this is the part that gets repeated,and finally
.nameto access thenamevalues.
[
  {
    children: [
      'The Nobleman'
    ],
    grandchildren: [
      'Adelaide',
      'Reginald',
      'Bertha',
      'Wulfield'
    ],
    id: person:grandmother
  }
]
Now, in a real situation it's possible that we won't know how far down the family tree to go. Our dataset for the story of the Enchanted Knights only spans three generations, but what if we had a lot more data and wanted to check for four, five, or more generations? In that case, typing out an extra line for each generation would be quite tiring.
@.{2}(->parent_of->person).name AS grandchildren,
@.{3}(->parent_of->person).name AS great_grandchildren...
There is an even more powerful syntax that we can use here which will go down to a certain maximum depth, collecting everything along the way. There are three things to know before we can use it.
The first key to this syntax is to use a range instead of a number. If we wanted to collect over four generations, we would use the range
{1..4}.The second key to the syntax is to start the whole query with a
@. This allows us to work with an object instead of just adding fields to a query, in the same way that we first learned in Chapter 4. We can then fill this object out with the fields that we want to see.The third and final key is to let the database know which path to follow at each depth. This is done by ending the path with
.@, known as the "repeat recurse" operator. Because it specifies the path to follow, it can only be used once.
Let's try to use this to do a query on all of the person records, going down a full four generations. This query will be a regular SELECT...FROM person, except that it will start with a @.{1..4} to indicate depths one to four, and will contain a field that we will call next that will hold the path ->parent_of->person.@. The database will see this field and know that it needs to follow it as far as it can, up to a depth of four.
Sounds complicated! However, when you see the syntax in practice you'll notice that it is surprisingly short.
And here is the output. Try reading it one person record at a time as you think about what the database did at each point. For example, the first record is person:adelaide, which has a [] for next, because Adelaide isn't connected as a parent_of to anything else. But for person:grandmother, it is able to go down a full two more levels because it kept finding more person records that it could then keep following down the ->parent_of->person path.
[
  {
    id: person:adelaide,
    name: 'Adelaide',
    next: []
  },
  {
    id: person:bear_knight,
    name: 'Bear Knight',
    next: []
  },
  {
    id: person:bertha,
    name: 'Bertha',
    next: []
  },
  {
    id: person:eagle_knight,
    name: 'Eagle Knight',
    next: []
  },
  {
    id: person:fish_knight,
    name: 'Fish Knight',
    next: []
  },
  {
    id: person:grandmother,
    name: 'Mother of the Nobleman',
    next: [
      {
        id: person:the_nobleman,
        name: 'The Nobleman',
        next: [
          {
            id: person:adelaide,
            name: 'Adelaide',
            next: []
          },
          {
            id: person:reginald,
            name: 'Reginald',
            next: []
          },
          {
            id: person:bertha,
            name: 'Bertha',
            next: []
          },
          {
            id: person:wulfield,
            name: 'Wulfield',
            next: []
          }
        ]
      }
    ]
  },
  {
    id: person:reginald,
    name: 'Reginald',
    next: []
  },
  {
    id: person:sorcerer,
    name: 'Zornebock',
    next: []
  },
  {
    id: person:the_nobleman,
    name: 'The Nobleman',
    next: [
      {
        id: person:adelaide,
        name: 'Adelaide',
        next: []
      },
      {
        id: person:reginald,
        name: 'Reginald',
        next: []
      },
      {
        id: person:bertha,
        name: 'Bertha',
        next: []
      },
      {
        id: person:wulfield,
        name: 'Wulfield',
        next: []
      }
    ]
  },
  {
    id: person:the_noblewoman,
    name: 'The Noblewoman',
    next: [
      {
        id: person:adelaide,
        name: 'Adelaide',
        next: []
      },
      {
        id: person:reginald,
        name: 'Reginald',
        next: []
      },
      {
        id: person:bertha,
        name: 'Bertha',
        next: []
      },
      {
        id: person:wulfield,
        name: 'Wulfield',
        next: []
      }
    ]
  },
  {
    id: person:wulfield,
    name: 'Wulfield',
    next: []
  }
]
That should be enough recursive queries for now! Let's get back to the story now to see how it ends.
The end of the story and some more RELATE practice
Fortunately, the Nobleman and his wife had another child: a son named Reginald. Reginald grew up to become a knight and set out to find his sisters.
Reginald discovered that an evil sorcerer had cursed their three husbands, who by now had children with their wives. The curse is why they transformed into angry beasts every once in a while.
Every time they were about to transform, they had to leave the castle and lock the doors so that they couldn't get back in and hurt their family. They remembered who they were as beasts, but couldn't stop themselves from trying to find and hurt their own family. What a sad life they led...
The rest of the story is too long to tell, but here is the short version.
Reginald eventually found the sorcerer's castle and discovered that the sorcerer had already died in battle a few years before. Inside the castle was an object that held the curse of the three knights, which Reginald destroyed. The knights were freed, and everybody lived happily ever after.
Wonderful! This is a relief, as many traditional German tales have some pretty tragic endings. But not this one.
To finish up our knowledge of RELATE in this chapter, here are some more things to know.
RELATE works on multiple records, but each relationship is individual
Multiple records can be related to each other in a single RELATE statement. That means that we can set parent_of or enemy_of for all of the person records in our story fairly quickly. This next example creates Reginald, along with the evil sorcerer named Zornebock.
The query output shows this as well. Note the output for the enemy_of relation that we created with a single statement, in which out is always the same: person:sorcerer. This makes sense, as he is everybody's enemy.
[
  {
    id: enemy_of:6lhupa0wf7b04lg76tf6,
    in: person:reginald,
    out: person:sorcerer
  },
  {
    id: enemy_of:eqh0nq377cchsedacm6v,
    in: person:bear_knight,
    out: person:sorcerer
  },
  {
    id: enemy_of:w7ec71o12wpysygg1l89,
    in: person:eagle_knight,
    out: person:sorcerer
  },
  {
    id: enemy_of:ftlsang4teidppytx8rk,
    in: person:fish_knight,
    out: person:sorcerer
  }
]
Multiplication of arrays in RELATE and records that don't exist yet
Let's imagine that there are a few more knights in the next town, but they have two sorcerer enemies instead of one. For simplicity's sake, we'll move away from the person record (because it has a defined schema) and just call them knight one and two, and sorcerer one and two.
What do you think the output of this RELATE statement will be?
The output is: four enemy_of tables!
[
  {
    id: enemy_of:ygldlu0xtj7diywntab4,
    in: knight:one,
    out: sorcerer:one
  },
  {
    id: enemy_of:7w8zti2nzmv4a2xr3i5x,
    in: knight:one,
    out: sorcerer:two
  },
  {
    id: enemy_of:9b78wjxh6o832yb2qtmw,
    in: knight:two,
    out: sorcerer:one
  },
  {
    id: enemy_of:rzpn40icvhofyltw3fq6,
    in: knight:two,
    out: sorcerer:two
  }
]
The first interesting part about this output is that a RELATE statement will return a number of records equal to the length of one side multiplied by the other. In this case, that means four records.
But the more interesting part might be that it worked in the first place. After all, we don't even have any knight or sorcerer records in the database. But no matter: a graph table is independent of the existence of records at the in and out position.
At this point, a query to see the enemies of the knights will return nothing because there are no knight records in the database.
[]Now let's see what the output is after we create the two knights.
This time SurrealDB picks up that they are related to enemy_of and looks for a sorcerer record, but doesn't see anything at the out part of the graph.
[
  {
    "->enemy_of": {
      "->sorcerer": []
    }
  },
  {
    "->enemy_of": {
      "->sorcerer": []
    }
  }
]
Finally, if we CREATE sorcerer:one, sorcerer:two, the query will now return them.
[
  {
    "->enemy_of": {
      "->sorcerer": [
        sorcerer:two,
        sorcerer:one
      ]
    }
  },
  {
    "->enemy_of": {
      "->sorcerer": [
        sorcerer:one,
        sorcerer:two
      ]
    }
  }
]
SCHEMAFULL graph tables and indexes
We learned how to create a schema for our record types a few chapters ago, and graph tables can be made SCHEMAFULL in the same way too. And without a schema, you can do anything you like.
That means that not only can we marry the Nobleman to more than one individual, his new spouses don't even have to be people!
[
  {
    in: cat:mrs_meow,
    out: person:the_nobleman
  },
  {
    in: person:the_nobleman,
    out: person:the_noblewoman
  },
  {
    in: cat:mr_meow,
    out: person:the_nobleman
  }
]
Another interesting behaviour that we'd like to prevent is the fact that relations can be created in the same way as many times as we like, even for the same records:
When you query for Mr. Bark's favourite food, the answer should be "biscuits", not "biscuits biscuits biscuits". That is exactly what the output below shows: three results when there should only be one.
[
  {
    "->likes": {
      "->food": [
        food:biscuit,
        food:biscuit,
        food:biscuit
      ]
    }
  }
]
We can define such tables to ensure that in and out must be unique, thus only having a single record ID in them.
You might think that DEFINE FIELD is the way to do it using a statement like the following:
/**
[test]

[test.results]
parsing-error = "Unexpected token `UNIQUE`, expected Eof
 --> [1:34]
  |
1 | DEFINE FIELD in ON TABLE married UNIQUE;
  |                                  ^^^^^^"

*/

DEFINE FIELD in ON TABLE married UNIQUE;
But it's actually done through a statement called DEFINE INDEX! This is because uniqueness for databases is most easily done through the creation of an index, as opposed to a full table scan which would be much less efficient. Indexes can be created for other reasons such as improved performance and don't need to be set as UNIQUE, but at the moment we are focusing on creating a unique constraint so we will leave the discussion of indexes as a whole to another chapter.
In any case, the syntax starts in this way:
DEFINE INDEX index_name ON TABLE table_name FIELDS [field names]We have the choice to add the UNIQUE keyword at this point, which is what we want. You will probably find yourself using UNIQUE frequently for fields related to emails, addresses, IDs, names, and anything else that only one record should have.
All together, our DEFINE INDEX statement looks like this.
When we execute this statement, SurrealDB returns an error - which is a good thing!
'Database index `only_unique` already contains [dog:mr_bark, food:biscuit], with record `likes:4v7y0y9424nysk5paagp`'That is because the likes table already contains more than one instance of dog:mr_bark as in and food_biscuit at out. We can SELECT * FROM likes LIMIT 2 to find two of the existing record IDs and give that to a DELETE statement to get rid of them.
Now that the extra likes tables are deleted, we can define the index.
/**
[test]

[[test.results]]
value = "NONE"

*/

DEFINE INDEX only_unique ON TABLE likes FIELDS in, out UNIQUE;
Having done so, it is now impossible for us to specify that Mr. Bark likes biscuits more than once.
'Database index `only_unique` already contains [dog:mr_bark, food:biscuit],
with record `likes:4u0yky84lrspxwv35pre`'
Using a new field as a unique constraint
Now what if we want to define a unique index on a relation of two equals, like in a friends_with or married_to table? In those relationships, it doesn't matter who is in or out, because friendship isn't about "befriending A" from one side and "being befriended by B" on the other.
We can start by defining a unique index on the in and out fields as before:
DEFINE INDEX only_unique ON TABLE friends_with FIELDS in, out UNIQUE;However, because we are never certain who is in or out in a friendship, that means that we can befriend the same two records twice through friends_with by switching the order around! It won't be until the third RELATE statement that it will violate the unique index that we defined.
-------- Query --------

[
  {
    id: friends_with:nsjdgitzyg5tw6df1f9q,
    in: cat:one,
    out: cat:two
  }
]

-------- Query --------

[
  {
    id: friends_with:xmk8xkngz3mt9vpa87wd,
    in: cat:two,
    out: cat:one
  }
]

-------- Query --------

'Database index `only_unique` already contains [cat:one, cat:two],
with record `friends_with:nsjdgitzyg5tw6df1f9q`'
Fortunately, there is a straightforward way to solve this problem. Since graph tables can contain their own fields, we can add a field (we'll call it key) that holds both in and out, but sorted through the array::sort() method. Since we are only using this field to check for uniqueness, we could also cast into a string which is easier to read than an array. Here is a quick demonstration of the output from this method.
[
  '[cat:one, cat:two]',
  '[cat:one, cat:two]'
]
So all we have to do is define the field, and then add an index that ensures that this field must be unique. Note that there is no need to specify the type because it is generated automatically, but you could add `TYPE option` if you like.
/**
[test]

[[test.results]]
value = "NONE"

[[test.results]]
value = "NONE"

*/

DEFINE FIELD key ON TABLE friends_with VALUE <string>[in, out].sort();
DEFINE INDEX only_unique ON TABLE friends_with FIELDS key UNIQUE;
With this unique key set up, we are now unable to create weird double friendships based on a friendship that already exists.
-------- Query --------

[
  {
    id: friends_with:g85n08h0kpwrnf6n3sui,
    in: cat:one,
    key: '[cat:one, cat:two]',
    out: cat:two
  }
]

-------- Query --------

"Database index `only_unique` already contains '[cat:one, cat:two]',
with record `friends_with:g85n08h0kpwrnf6n3sui`"
Well done! Here is the full dataset for your reference.
This concludes our first mini-project. Hopefully SurrealDB's `` and `<-` syntax has become familiar over the last four chapters. If not, don't worry: we still haven't even approached the halfway point of the book and there are many similar queries to come.
Practice time
Answer
An index with UNIQUE will do the trick. You'll probably also want to make sure that the field is a string.
DEFINE FIELD email ON TABLE user TYPE string;
DEFINE INDEX only_unique_emails ON TABLE user FIELDS email UNIQUE;
2. But how would you make sure that each user's email is valid?
Hint: See if you can find a function that can make this work.
Answer
The function to make this assertion is found inside SurrealDB's string functions. Using one of them called string::is_email() will do the trick:
DEFINE FIELD email ON TABLE user TYPE string ASSERT $value.is_email();3. How would you find all the moons that orbit all planets that orbit a star called The Sun?
Here's some sample data to get you started.
/**
[test]
*/

CREATE star SET name = "The Sun";
CREATE planet SET name = "Saturn";
CREATE moon SET name = "Titan";
CREATE moon SET name = "Mimas";

RELATE (SELECT * FROM planet WHERE name = "Saturn")->orbits->(SELECT * FROM star WHERE name = "The Sun");
RELATE (SELECT * FROM moon WHERE name IN ["Titan", "Mimas"])->orbits->(SELECT * FROM planet WHERE name = "Saturn");

CREATE star SET name = "Proxima Centauri";
CREATE planet SET name = "Proxima Centauri b";
CREATE moon SET name = "Distant moon";

RELATE (SELECT * FROM planet WHERE name = "Proxima Centauri b")->orbits->(SELECT * FROM star WHERE name = "Proxima Centauri");
RELATE (SELECT * FROM moon WHERE name = "Distant moon")->orbits->(SELECT * FROM planet WHERE name = "Proxima Centauri b");
Answer
One way to do it is to start at the moon records, follow the path to see what planets they orbit, and then follow the path once more to see what stars the planets orbit. You'll now find yourself at the star records, after which you can filter by name.
/**
[test]

[[test.results]]
value = "[]"

[[test.results]]
value = "[]"

*/

SELECT * FROM moon WHERE "The Sun" IN ->orbits->planet->orbits->star.name;
SELECT * FROM moon WHERE "Proxima Centauri" IN ->orbits->planet->orbits->star.name;
4. How would you find all the planets with two or more moons that orbit the Sun?
Answer
The `count()` function and two graph queries will do the trick here. One uses `` to see what it is orbiting.
/**
[test]

[[test.results]]
value = "[]"

*/

SELECT * FROM planet WHERE count(<-orbits) > 1 AND "The Sun" in ->orbits->star.name;
5. How would you return all the planets and moons around each star?
Answer
You could do it with the following query that goes down one level, and then goes down two levels.
/**
[test]

[[test.results]]
value = "[]"

*/

SELECT
  *,
  <-orbits<-planet.name,
  <-orbits<-planet<-orbits<-moon.name
FROM star;
Note that you could use an alias here, but not using an alias will combine the structure of the two graph queries and make it clear which moons are orbiting which planets.
/**
[test]

[[test.results]]
value = "[]"

*/

SELECT
  *,
  <-orbits<-planet.name AS planet_names,
  <-orbits<-planet<-orbits<-moon.name AS moon_names
FROM star;
6. What is a quick way to return a list of all of the rivers that flow into a large river?
For this case, we will create two small rivers that flow into one medium river, which then flows into a large river.
/**
[test]

[[test.results]]
value = "[{ id: river:small }, { id: river:tiny }, { id: river:medium }, { id: river:large }]"

[[test.results]]
value = "[{ id: flows_into:ahxjm2vowlmyqxtk3qpp, in: river:small, out: river:medium }, { id: flows_into:o1ezpymze5uj9766a8ao, in: river:tiny, out: river:medium }]"
skip-record-id-key=true

[[test.results]]
value = "[{ id: flows_into:y8fcwt0u4ocz9utz2xx2, in: river:medium, out: river:large }]"
skip-record-id-key=true

*/

CREATE river:small, river:tiny, river:medium, river:large;

RELATE [river:small, river:tiny]->flows_into->river:medium;
RELATE river:medium->flows_into->river:large;
Answer
This can be found using the <-flows_into<-river path. One way to do it is semi-manually with a depth of 1 for one line and a depth of 2 for the next.
SELECT
    @.{1}<-flows_into<-river AS medium_rivers,
    @.{2}<-flows_into<-river AS small_rivers
FROM river:large;
Another way to do it is with a query that collects each river along the way along a number of depths. For example, you might start out with a depth of 1 to 5:
SELECT @.{1..5}.{
    id,
    contains: <-flows_into<-river.@
} FROM river:large;
And the resulting output would show that the actual final depth for this query is three. You could then change @.{1..5} to @.{1..3} to make it clear that there are three depths to this system of rivers, or keep it at @.{1..5} if more rivers are going to be added later on.
[
  {
    contains: [
      {
        contains: [
          {
            contains: [],
            id: river:small
          },
          {
            contains: [],
            id: river:tiny
          }
        ],
        id: river:medium
      }
    ],
    id: river:large
  }
]