Deploy an instance from SurrealDB Studio in seven steps.
Deployment takes a few minutes. You can change everything afterwards except the instance name and the region.
Before you begin
You need:
An account. See Accounts and sign-in.
An organisation to hold the instance. See Organisations.
1. Select a plan
Open the organisation that will hold the instance.
Go to Instances.
Select Deploy new instance.
The first step of the flow asks for a plan.
| Plan | Topology | How it scales |
|---|---|---|
| Start | A single node | Vertically only |
| Scale | A fault-tolerant cluster of three nodes or more | Vertically and horizontally |
Each card lists the capacity ceilings and the starting price for that plan.
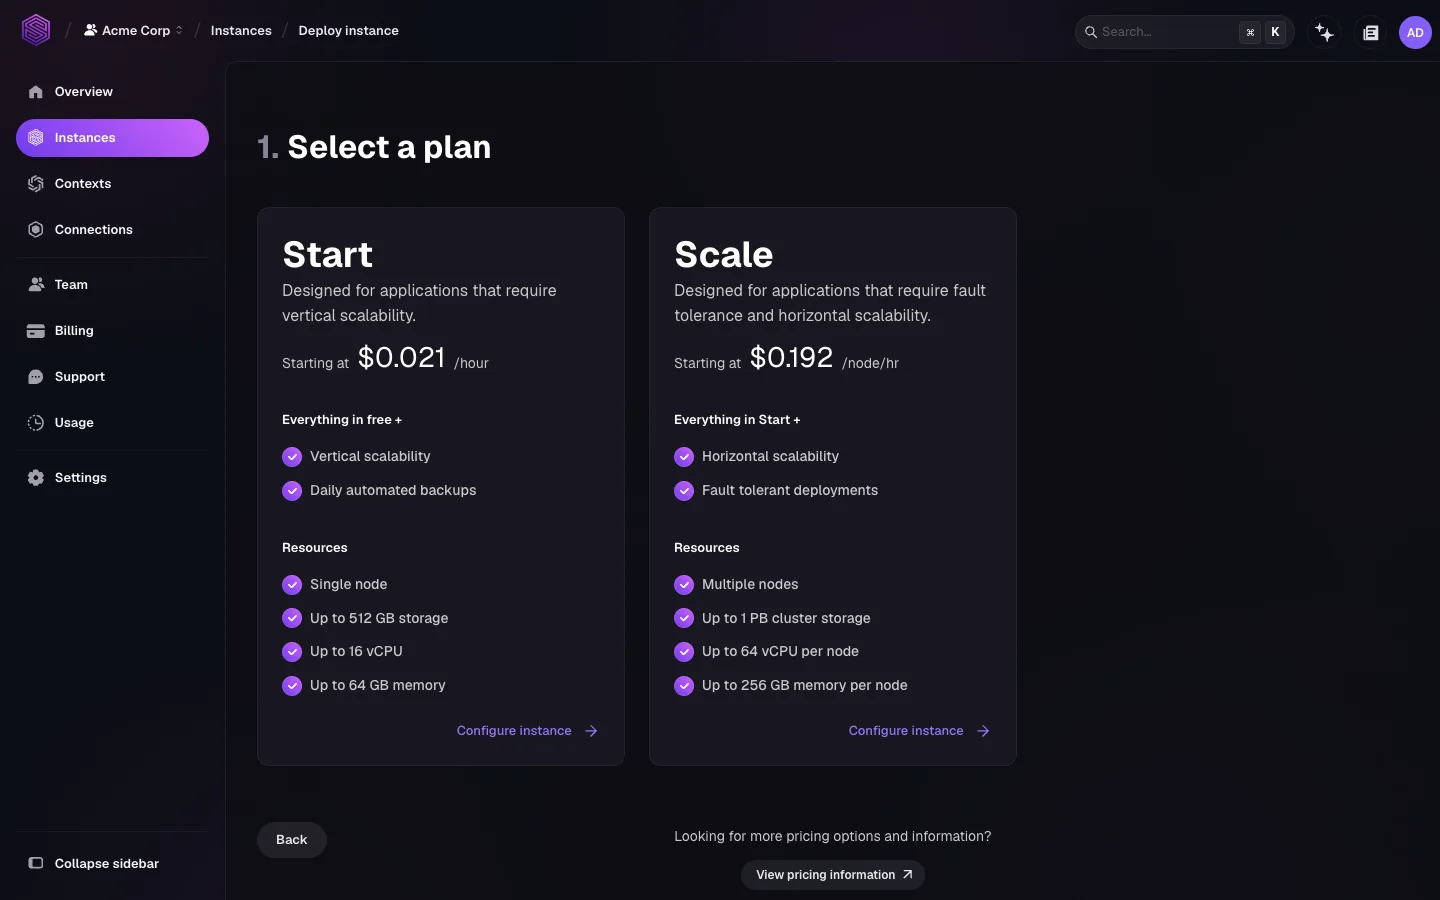
The plan fixes the topology of the instance. To move a workload from Start to Scale, deploy a Scale instance, then restore a backup or import an export into it. Choose Scale if the workload must survive the loss of a node. See High availability.
Select Configure instance on the plan you want.
2. Choose an instance type
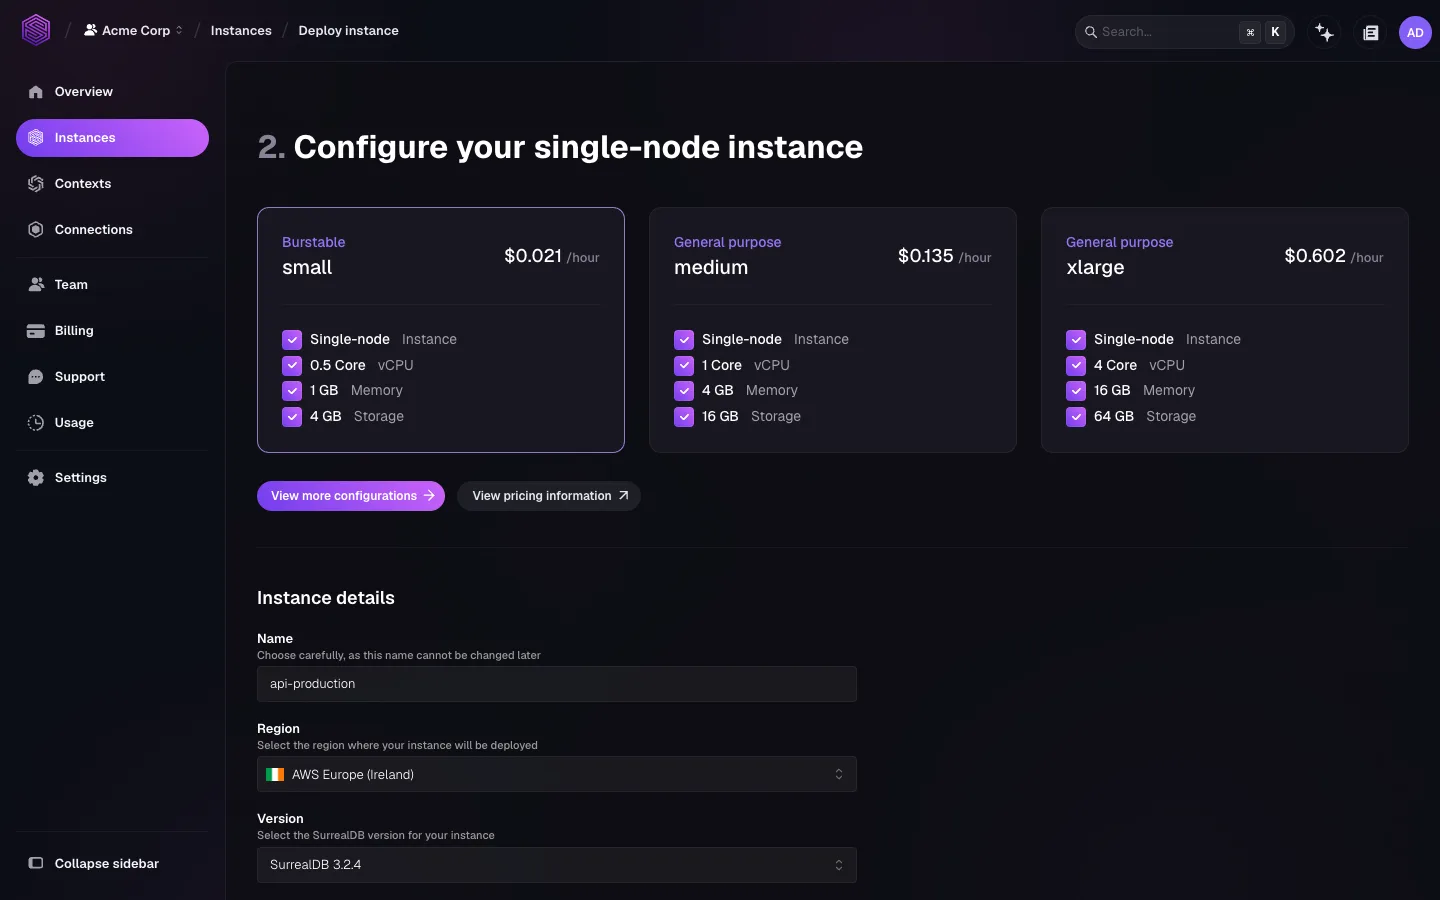
Instance types set the vCPU, the memory, and the baseline storage for each node. Three families are available.
| Family | Behaviour | Suited to |
|---|---|---|
| Free | A fixed, no-cost instance with a small storage allowance | Trying SurrealDB out |
| Burstable | Full CPU in short bursts, throttled under sustained load | Testing, starter projects, and low-traffic applications |
| General purpose | Sustained CPU and memory with no throttling | Production traffic and workloads at scale |
Select View more configurations to expand the shortlist to every size available on the plan.
3. Enter the instance details
Complete the three fields in the Instance details form.
Name identifies the instance in the organisation and in every connection string. You cannot change it later, so use a name that stays meaningful: api-production, api-staging, or analytics-eu.
Region determines the latency to your clients and where the data resides, and it sets which cloud provider runs the instance. You cannot change it later either. Deploy into the same region as your application stack where you can. Instances are currently available in:
| Provider | Region |
|---|---|
| AWS | US East (N. Virginia) |
| AWS | US West (Oregon) |
| AWS | Europe (Ireland) |
| AWS | AP South (Mumbai) |
| Azure | Europe (Germany) |
| Azure | US East 2 (Virginia) |
| Azure | South America (Brazil) |
The region selector shows what is available to your organisation, and that list is the authoritative one. AWS PrivateLink is offered in a subset of AWS regions.
Version sets the SurrealDB release the instance runs. Take the latest stable release unless you have a reason not to. You can upgrade an older release later from Settings → Version. See Versions and upgrades.
4. Choose the starting data
A new instance can start empty or with data already in place.
| Option | Result |
|---|---|
| Empty | An instance with no namespaces or databases |
| Demo dataset | A sample dataset and example queries to explore |
| Upload from file | Data loaded from a file you supply |
| Restore from backup | A copy of an existing instance, taken from one of its backup snapshots |
Restore from backup is how a restore works. The snapshot becomes a new instance and never overwrites the original. The backup must come from the same region, and the storage size must be at least as large as the source.
5. Set the storage capacity
Storage is provisioned per instance, and the available range depends on the plan and the instance type. On Start, the range grows with the memory of the type: see the Storage limits on Start page for more details.
You can increase storage later but never decrease it. Start close to what you need rather than over-provisioning. See Scaling.
6. Review and deploy
Select Continue to checkout to show the order for review.
Enter payment details if the organisation does not have them yet. See Billing.
Confirm the order.
The instance is provisioned within a few minutes.
7. Verify the instance
Go to Instances in the organisation.
Confirm the new instance appears in the list.
Open the instance and check that the dashboard reports the version, region, and instance type you chose.
Connect to the instance and run a query.
If the instance started empty, it has no namespace or database yet. Create both before you run a query. See Connect via SurrealDB Studio.
Deploying from the command line
surreal cloud instance create performs the same deploy, which is what you want in CI or in a provisioning script. See surreal cloud instances.
Next steps
Connect to an instance: SurrealDB Studio, the CLI, SDKs, and HTTP.
Configure an instance: capabilities, compute, and storage.
Monitoring: confirm the instance is healthy.