Change the settings of a running instance from Instance settings in SurrealDB Studio.
To open the settings, select the instance, then select Instance settings on the dashboard or Settings in the sidebar.
Settings is organised into tabs.
| Tab | What it controls |
|---|---|
| General | The instance id, and the pause and delete actions |
| Capabilities | What the instance permits at runtime: scripting, endpoints, functions, and network access |
| Version | The SurrealDB release the instance runs. See Versions and upgrades |
| Compute | The instance type and the storage capacity |
| Backups | Snapshot frequency, retention, and restore. See Backups and recovery |
The Databases and Data tabs work on the contents of the instance rather than on the instance itself.
Capabilities
Capabilities decide what the database engine will do at runtime. They are the main security control on an instance: a capability that is switched off cannot be re-enabled by a query, a user, or an access method. The underlying model is described in Capabilities.
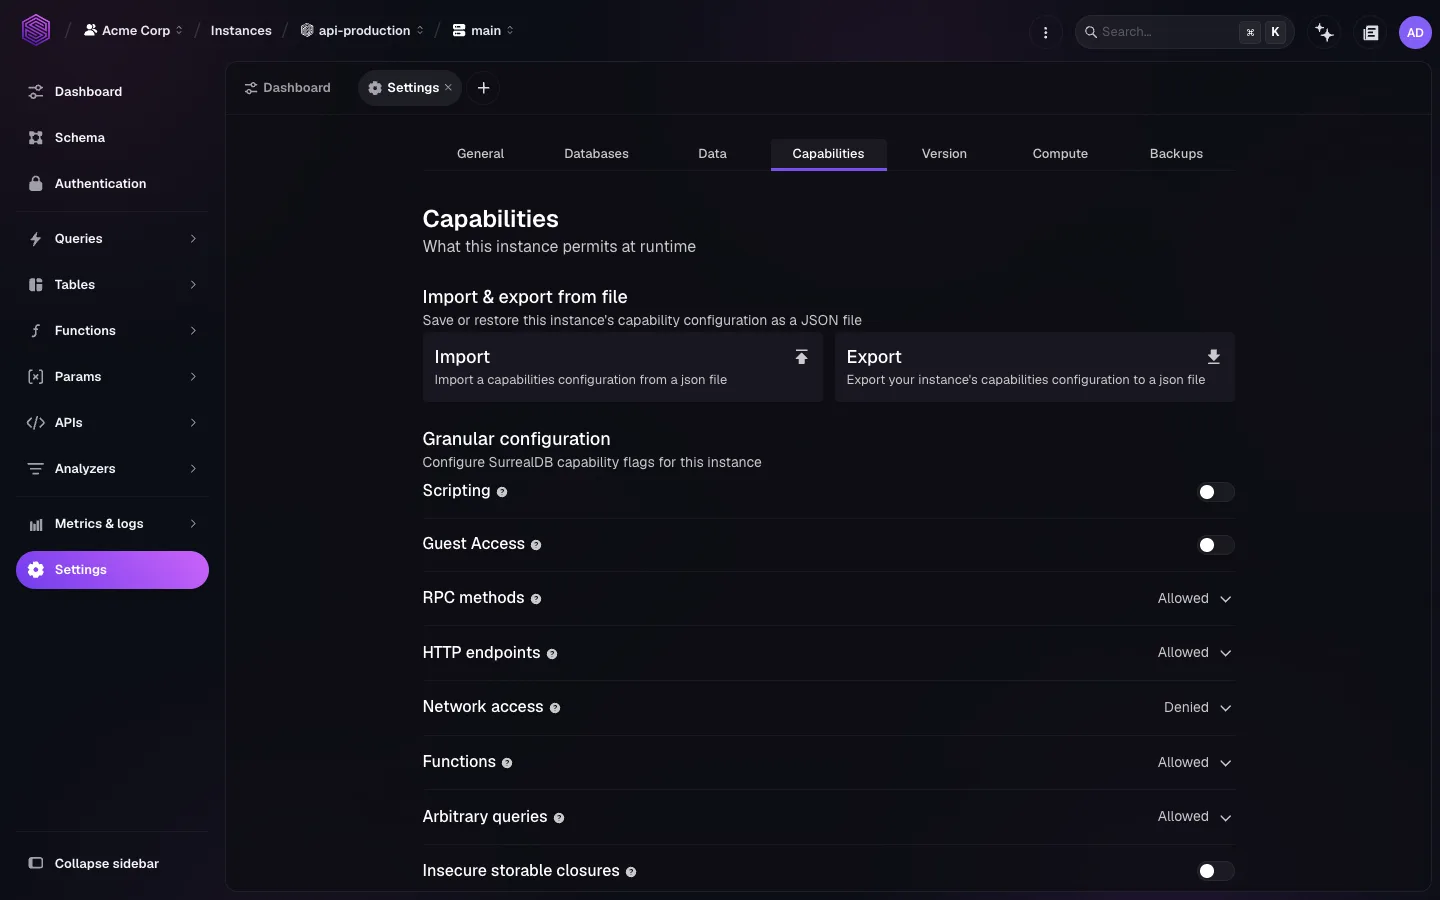
Two kinds of control appear in the list.
Switches turn a single capability on or off:
Scripting: whether embedded JavaScript functions run.
Guest access: whether unauthenticated clients can perform any operation.
Insecure storable closures: whether closures can be stored in records.
Allow and deny lists apply to capabilities with many members: RPC methods, HTTP endpoints, functions, and network access. Each list starts from a default and takes exceptions:
Allowed by default: everything is permitted, and you list what to deny.
Denied by default: nothing is permitted, and you list what to allow.
For a production instance, deny by default and allow only what the application uses. The cost is that you must extend the list whenever the application changes.
Network access governs outbound HTTP requests made from inside queries, and is denied by default. It does not control who can reach the instance. See Network access for the pattern syntax, and Private connectivity for inbound access modes.
The Import and Export buttons read and write the whole capability configuration as a JSON file. Use the export to keep staging and production aligned, or to hold the configuration in version control. surreal cloud instance capabilities does the same from a terminal. See surreal cloud instances.
Compute and storage
The Compute tab holds the instance type and the storage capacity. The active type is marked, and the Free, Burstable, and General purpose families are on separate tabs.
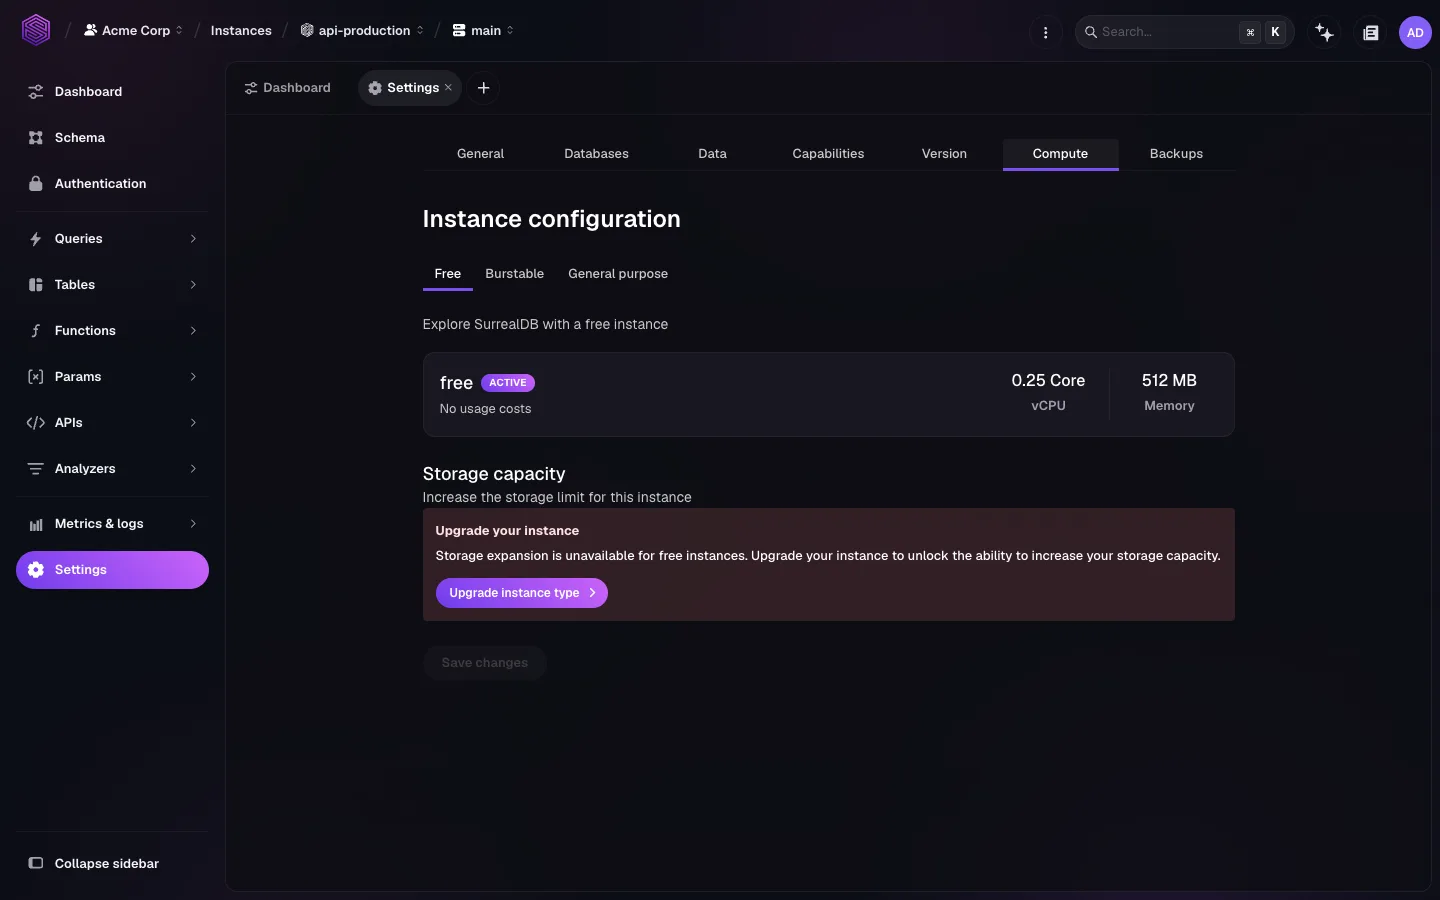
To change the instance type:
Open Instance settings → Compute.
Select the instance type you want.
Select Save changes.
To add more disk storage:
Open Instance settings → Compute.
Set the value under Storage capacity.
Select Save changes.
Changing the instance type moves the instance to a larger or smaller size and rebills accordingly. Storage can grow but never shrink, and you can increase the disk size once every six hours.
Change the type and the storage in separate saves. The storage slider goes up to the maximum of the type the instance is on now, so the maximum of a new type is only available after the type change is saved. A type change also sets the storage to the starting storage of the new type, and the six-hour wait starts again from that change. The Storage limits on Start page lists the starting and maximum storage of each type.
Storage expansion is unavailable on free instances. Move to a paid instance type to change storage capacity. The move happens in place, and the instance keeps its data.
Expect a brief reconnect while the instance restarts on the new size. For when to resize and what to watch afterwards, see Scaling.
Pause an instance
Pausing stops compute without losing data. A paused instance is unreachable until you resume it, its data and configuration are kept, and usage is not billed while it is paused.
To pause an instance:
Open Instance settings → General.
Select Pause instance.
Confirm the action.
Pausing suits environments with predictable idle periods, such as a staging instance overnight or a demo between engagements.
Before you pause, check that nothing depends on the instance being reachable. Connection pools, scheduled jobs, and health checks fail against a paused instance rather than queue against it.
Unused free instances are paused automatically after seven days.
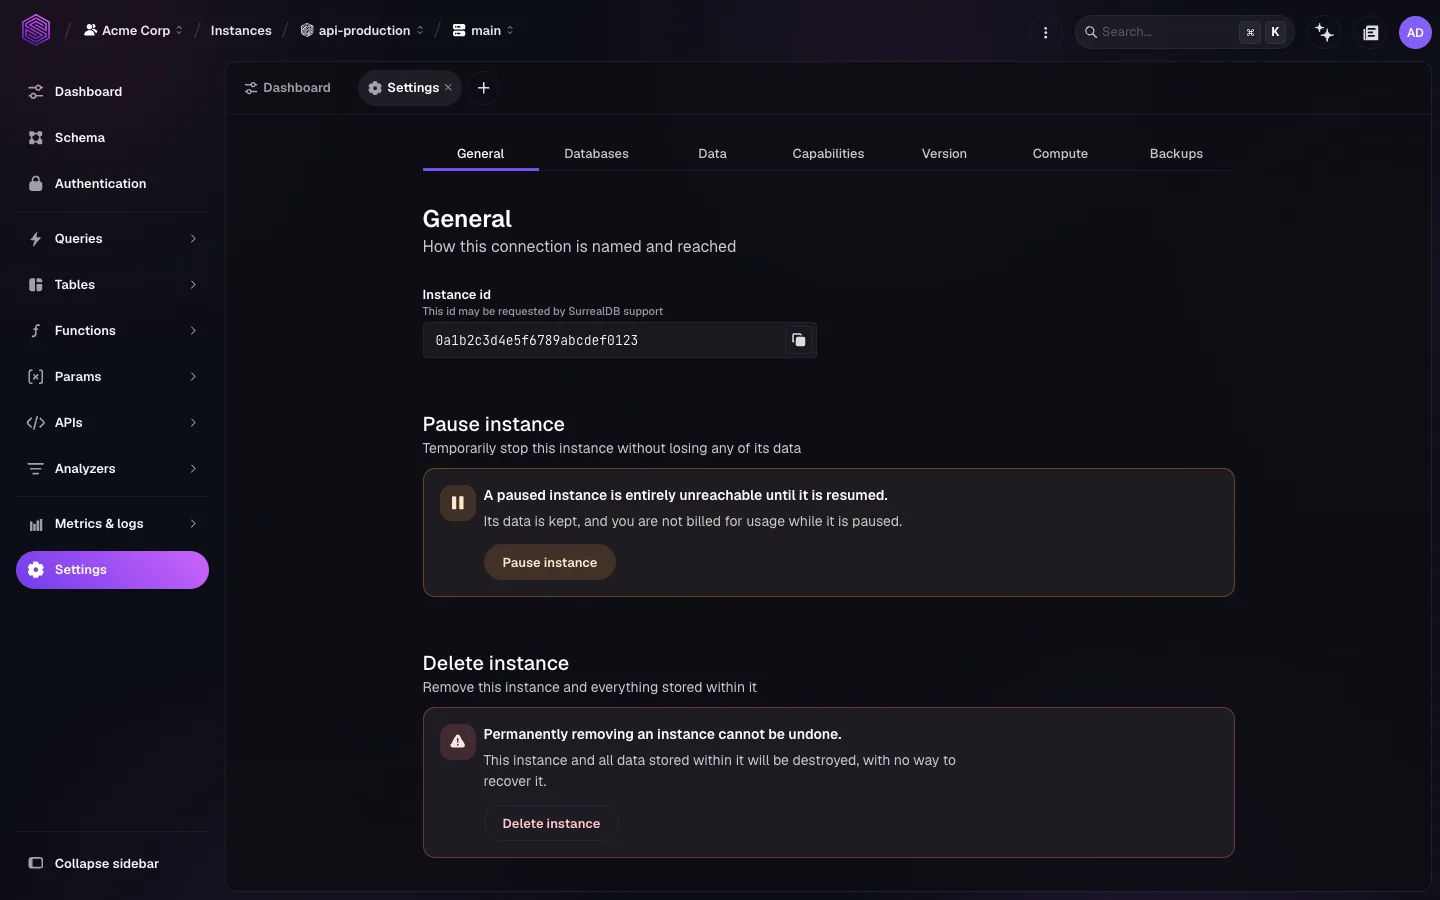
Resuming brings the instance back on the same configuration and the same endpoint.
Delete an instance
Deleting destroys the instance and everything stored in it. You cannot undo it, and support cannot recover a deleted instance.
Do not treat the snapshots of an instance as the safety net for deleting it. If you might need the data later, restore a backup into a new instance or take a logical export first. Confirm the export loads cleanly before you delete.
To delete an instance:
Open Instance settings → General.
Select Delete instance.
Confirm the action.
surreal cloud instance pause, surreal cloud instance resume, and surreal cloud instance delete are the command-line equivalents.
The instance id
The General tab also shows the instance id. SurrealDB support may ask for it when investigating an issue. The id identifies the instance unambiguously where the name does not, because names are only unique within an organisation.
Next steps
Connect to an instance: SurrealDB Studio, the CLI, SDKs, and HTTP.
Monitoring: confirm a configuration change had the effect you expected.
Backups and recovery: snapshot frequency, retention, and restore.