The GraphQL query view in SurrealDB Studio provides syntax highlighting, query validation, and real-time execution, with results displayed as the JSON structure returned by GraphQL.
Getting started
Before you can start making queries, you need to start SurrealDB with the GraphQL module enabled. You can do this by starting a new instance of SurrealDB with the surreal start command.
surreal start --log debug --user root --password secretAfter starting the SurrealDB instance, you can navigate to SurrealDB Studio to start a new connection.
Start a new connection
In the top left corner of the SurrealDB Studio, start a new connection. Ensure that the connection information is the same as the one you used to start the SurrealDB instance. In the example above we have set the user to root and the password to secret.
Querying via GraphQL is not supported in the SurrealDB Studio sandbox.
Learn more about starting a connection in the SurrealDB Studio documentation.
Setting a namespace and database
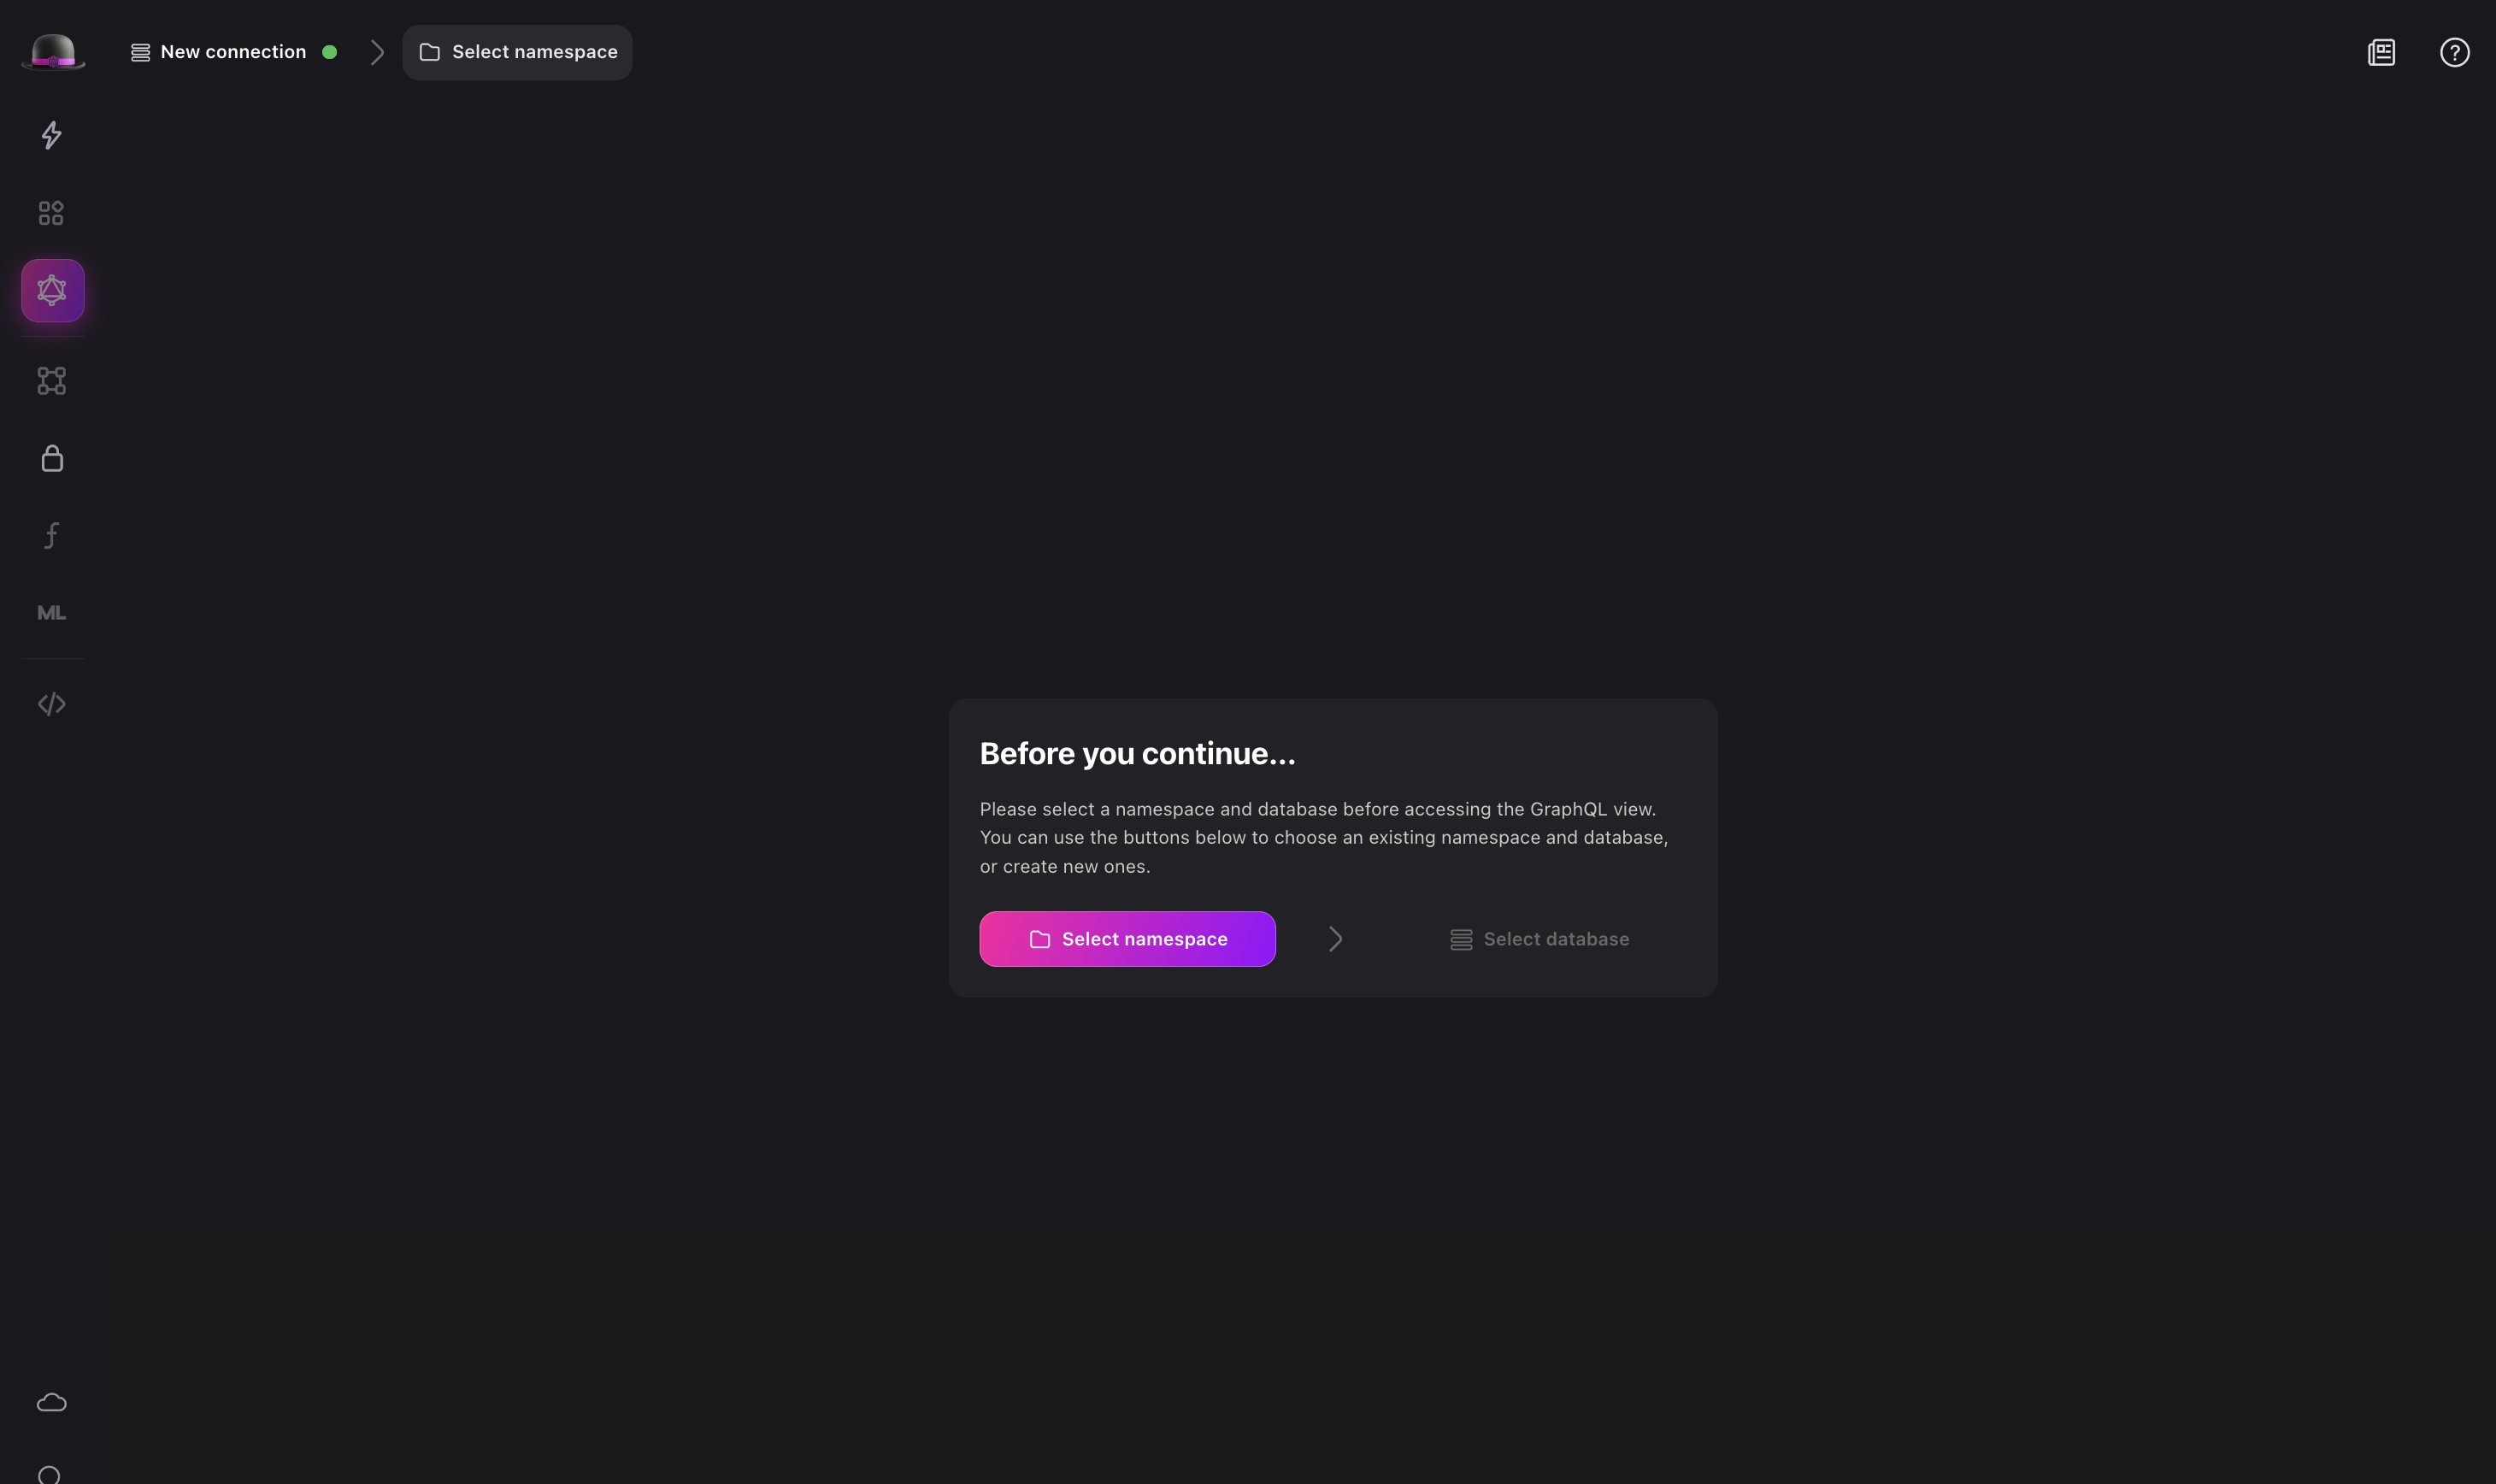
Before you can start writing queries, you need to set the namespace and database you want to use. For example, you can set the namespace to test and the database to test. This will set the namespace and database for the current connection.
Additionally, you can start serving from SurrealDB Studio, which also enables GraphQL automatically, starting a server on http://localhost:8000 by default for a root user with username and password root.
Preparing your database
Next, use the SurrealQL query editor to create some data. For example, you can create a new user table with fields for firstName, lastName, and email and add a new user to the database.
In order to allow querying the created table using GraphQL, you will need to explicitly enable GraphQL using the DEFINE CONFIG statement. This will allow you to query the table using GraphQL on a per-database basis.
This must be followed by statements to explicitly define the resources to query. That is, you must use the DEFINE TABLE statement to define the table, and DEFINE FIELD statement to define the fields for the table. This is because GraphQL differs from SurrealDB itself in requiring resources to be defined before they can be used.
DEFINE TABLE user SCHEMAFULL;

-- Enable GraphQL for the user table.
DEFINE CONFIG GRAPHQL AUTO;

-- Define some fields. Not strictly necessary for
-- SurrealDB itself, but required for GraphQL
DEFINE FIELD firstName ON TABLE user TYPE string;
DEFINE FIELD lastName ON TABLE user TYPE string;
DEFINE FIELD email ON TABLE user TYPE string
  ASSERT string::is_email($value);
DEFINE INDEX userEmailIndex ON TABLE user FIELDS email UNIQUE;

-- Create a new User
CREATE user CONTENT {
    firstName: 'Jon',
    lastName: 'Doe',
    email: 'Jon.Doe@surrealdb.com',
};
Write your first GraphQL query
After you have created some data, you can start writing GraphQL queries. You can use the SurrealDB Studio GraphQL editor to write your GraphQL queries.
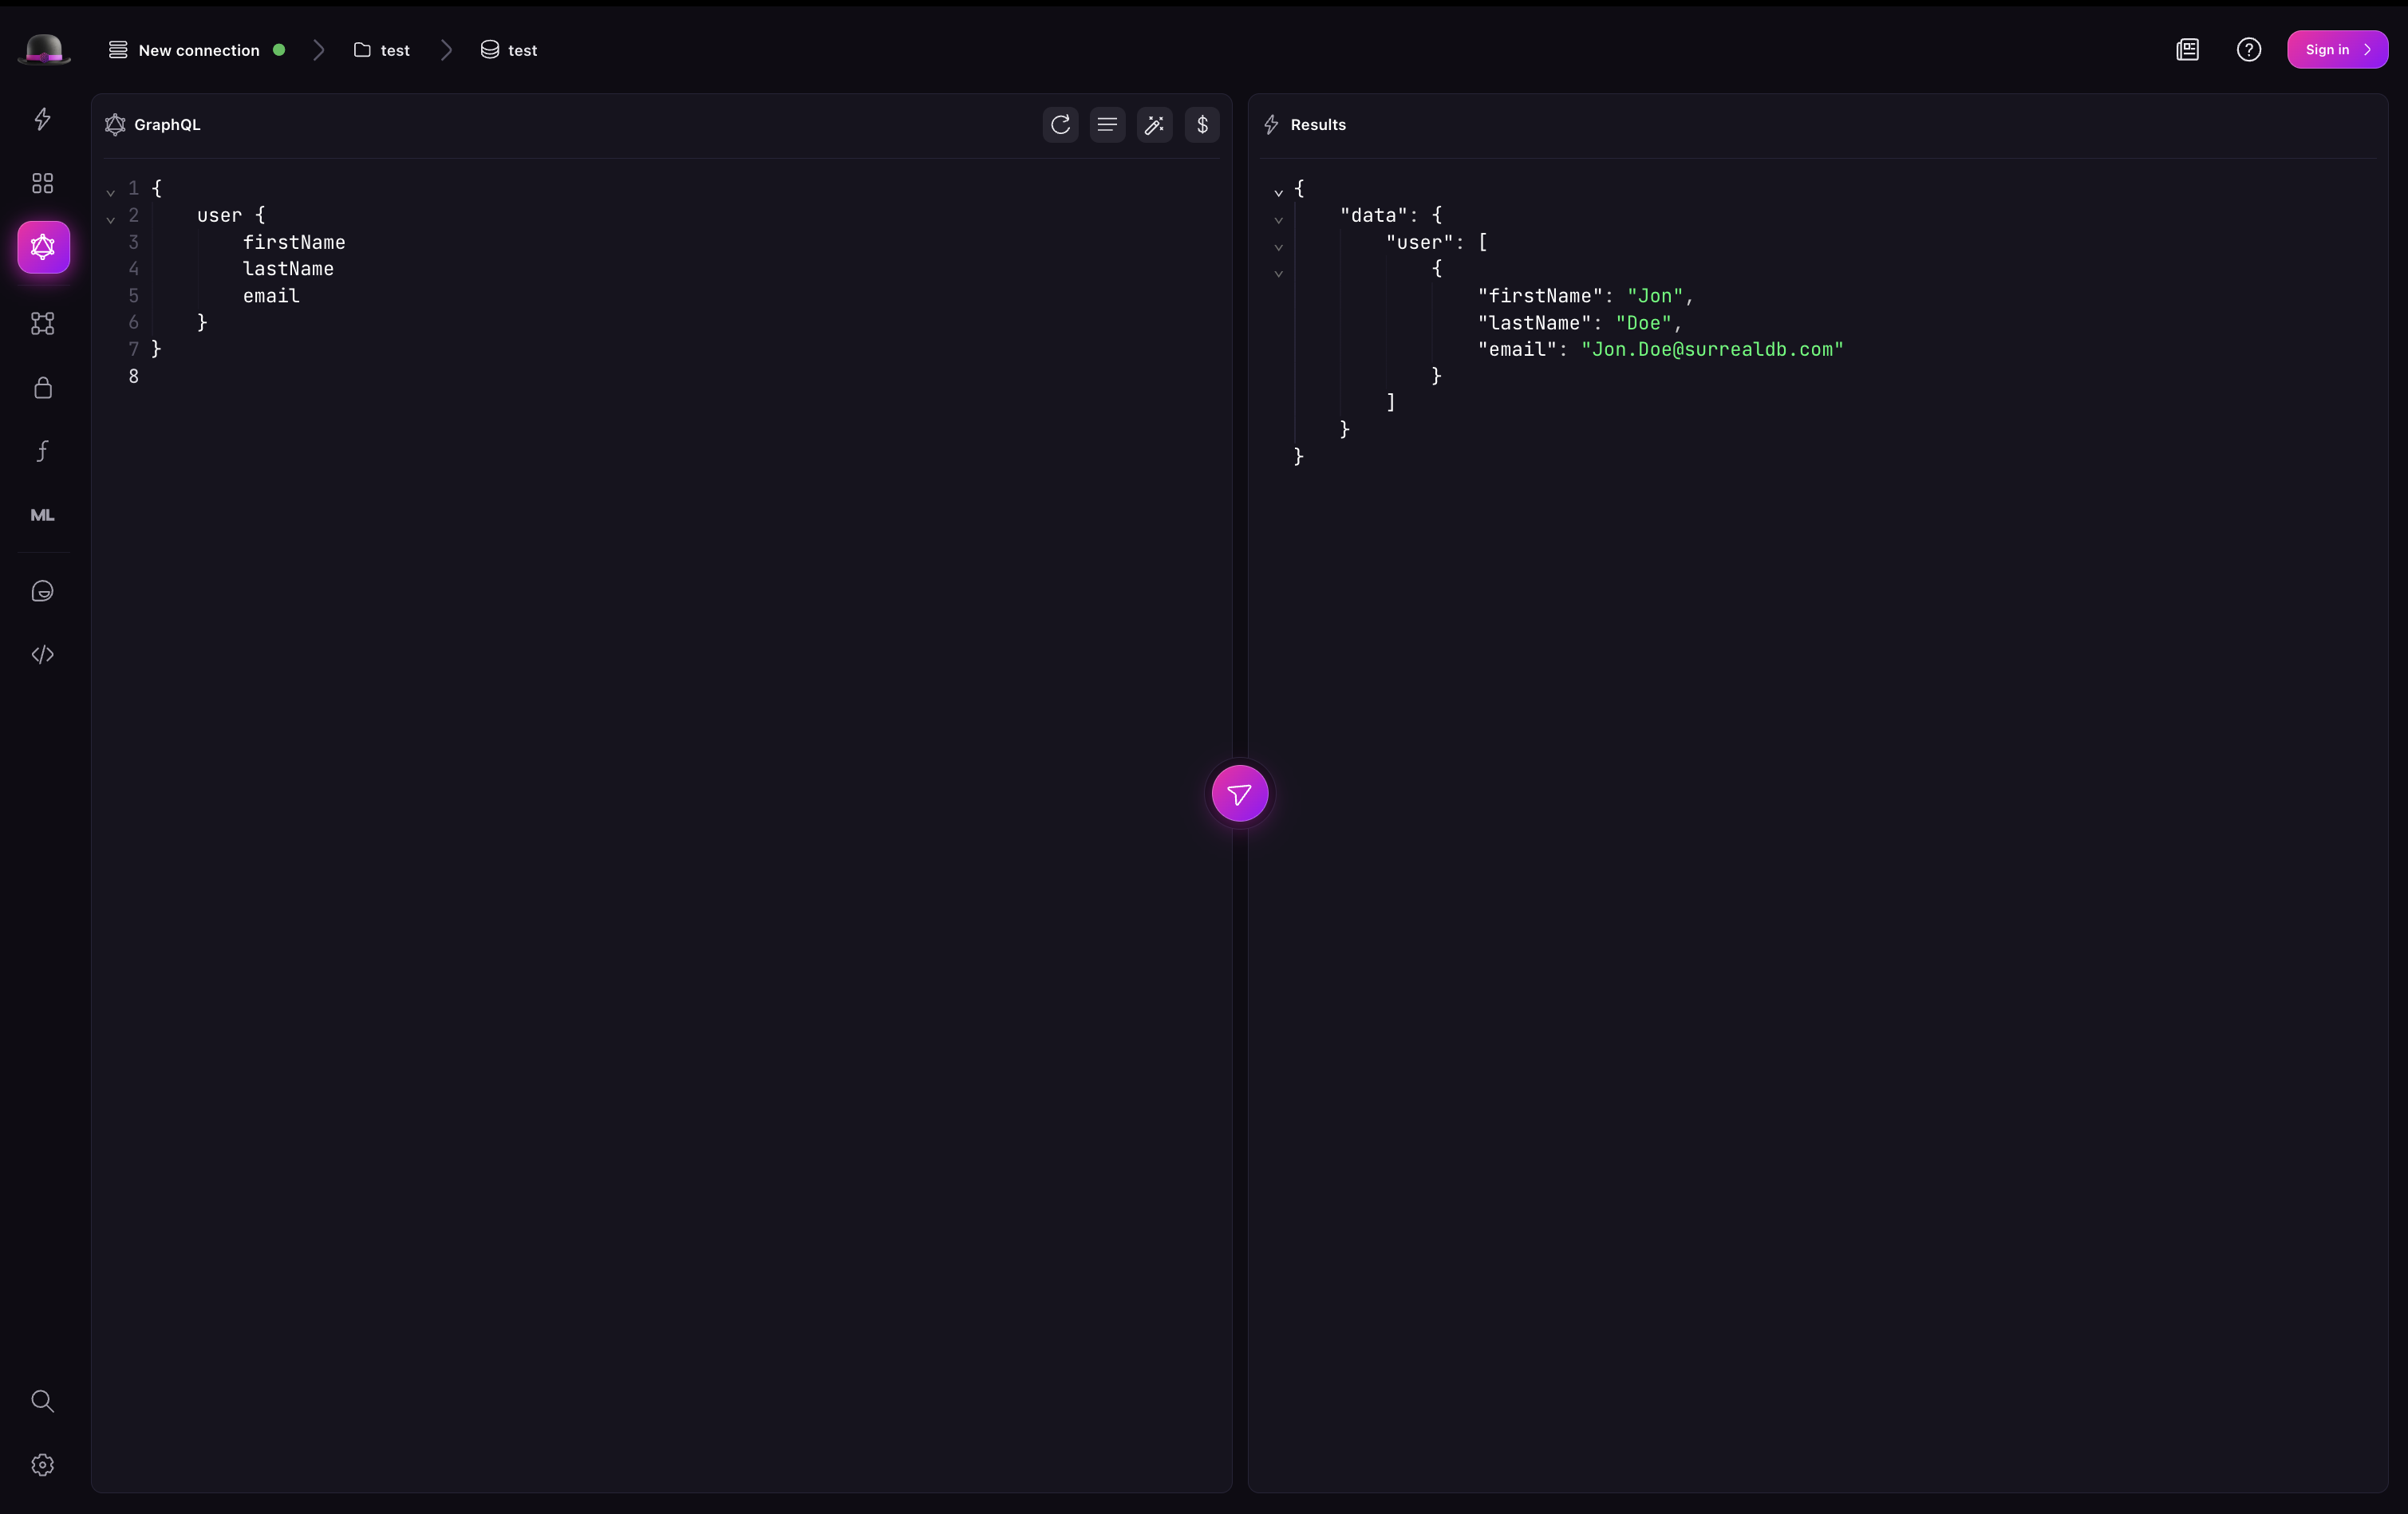
For example, to query the user table for all records, you can write the following GraphQL query:
{
    users {
        firstName
        lastName
        email
    }
}
And to get the user with the email "Jon.Doe@surrealdb.com", you can write the following GraphQL query:
{
    users(filter: {email: {eq: "Jon.Doe@surrealdb.com"}}) {
        firstName
        lastName
    }
}
SurrealDB Studio will automatically validate the query and provide you with the results.
Introspection
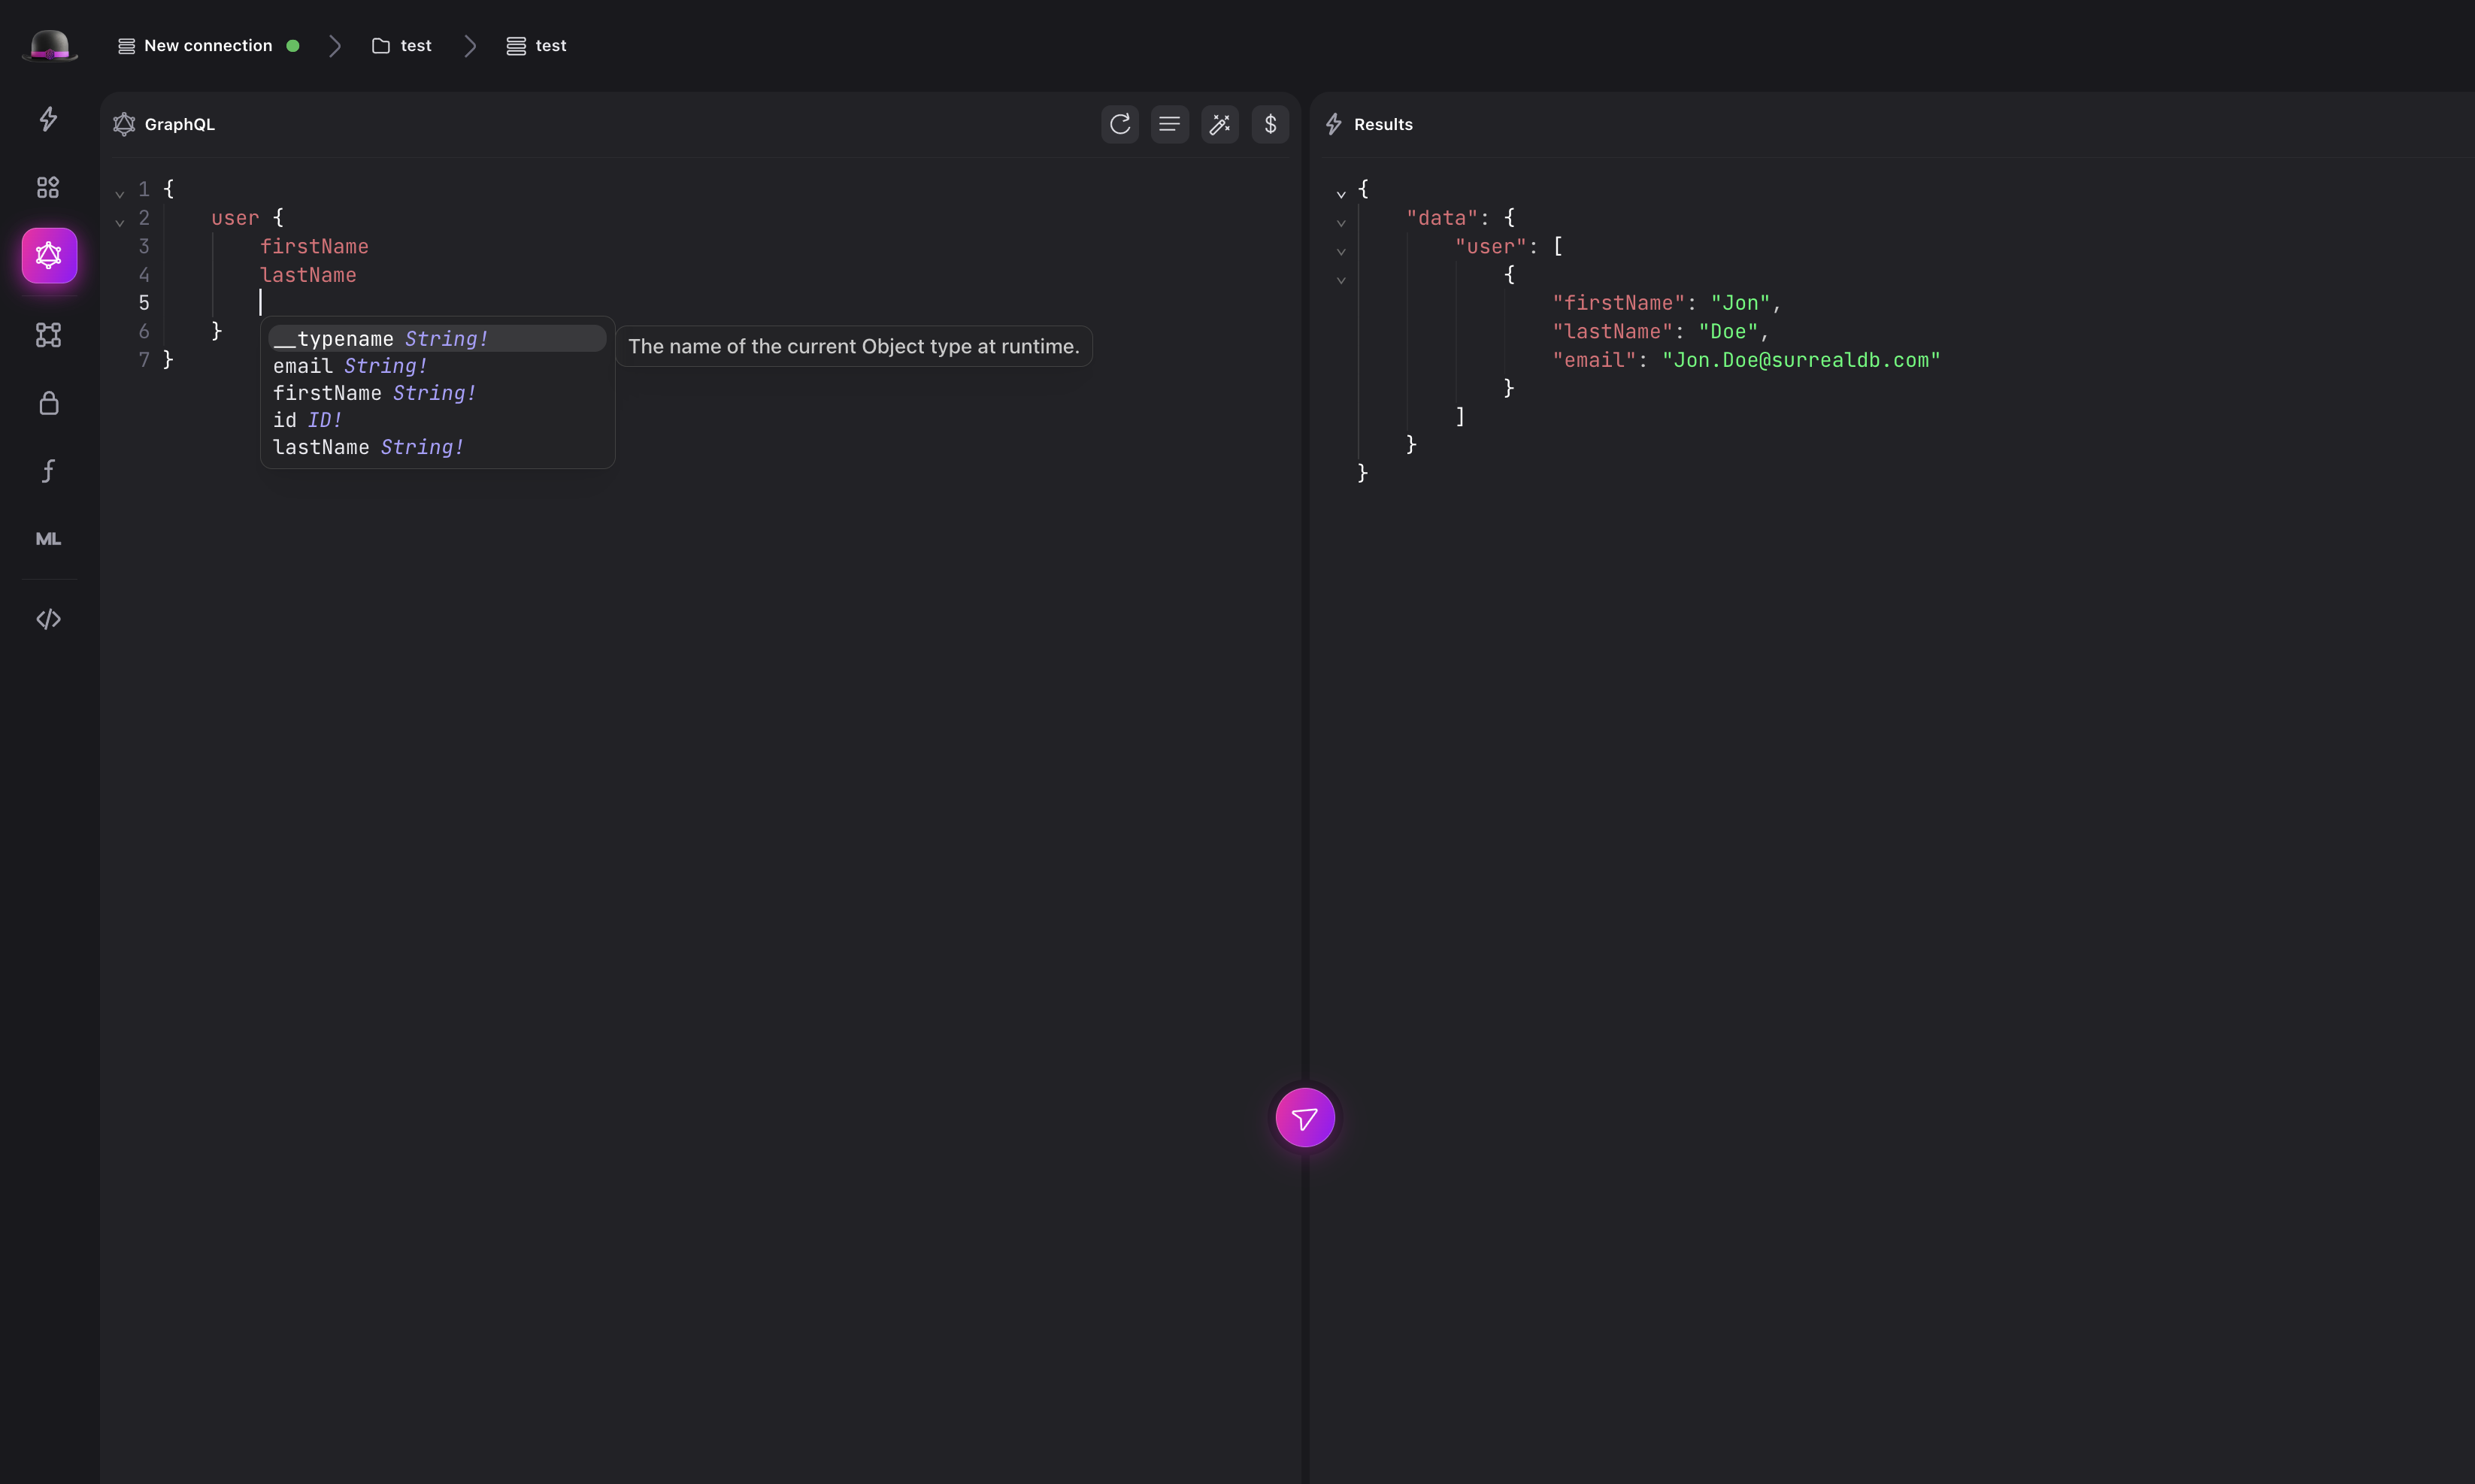
SurrealDB Studio also supports introspection with GraphQL. This means that you can query the database and SurrealDB Studio will automatically infer the type of the data you are querying. For example, if you query the user table for all records, SurrealDB Studio will automatically infer the type of the data to be user.
Learn more
To learn more about the GraphQL view in SurrealDB Studio, check out the SurrealDB Studio documentation.