


This page will guide you through the process of setting up and using Surrealist. At this point we assume you have already installed Surrealist on your system. If you have not done so yet, please refer to the installation guide.
Start screen
When launching Surrealist for the first time you will be greeted by the start screen. This screen allows you to easy jump into a sandbox environment or create a new connection to your SurrealDB instance.
If you are new to SurrealDB or looking to experiment with SurrealQL, we recommend starting with the sandbox environment. This environment allows you to test and experiment without installing the SurrealDB database or storing data persistently. To persist your data while still experimenting, click on Deploy to Cloud in Surrealist, where you can create a free SurrealDB Cloud instance to hold your data.
If you are looking to connect to a local or remote hosted SurrealDB instance, you can create a new connection by clicking the Create new button. This will open the connection dialog, then select the Connection option where you can enter your database details.
Alternatively, you can select the Cloud instance option where you can create a new connection to a SurrealDB Cloud instance. Learn more about SurrealDB Cloud in the SurrealDB Cloud documentation.

Connections
In order to interact with a SurrealDB database you must first create a connection. Connections store the details required to connect to a database, such as the endpoint, namespace, database, and authentication details. When you select an active connection in Surrealist, you will connect to the database and be able to interact with it using the available interface views.
After opening a connection, you can switch to another connection at any time by pressing the connection name in the top left of the interface. This will open the connection list allowing you to switch to another connection, or create a new one.
Within the connection list you will also find a special connection called Sandbox, which is always available and allows you to test and experiment without storing data persistently. This connection is useful for learning SurrealQL, testing queries, and more. As the Sandbox connection runs inside a single thread within the browser's WebAssembly engine, it should not be used to estimate or evaluate performance.
Creating a connection
When creating a new connection you will be prompted with a dialog to enter your database details. These details are required to connect to your SurrealDB instance.
Protocol dropdown: The protocol determines how Surrealist connects to the database. If you are unsure, select
HTTP.Endpoint: The address of your database. This can be localhost, an ip address, or a domain name.
Authentication method: The auth method determines how you want to authenticate with your database.
Important
Depending on the selected authentication method, you will be prompted to enter additional details such as a username and password, or a token.
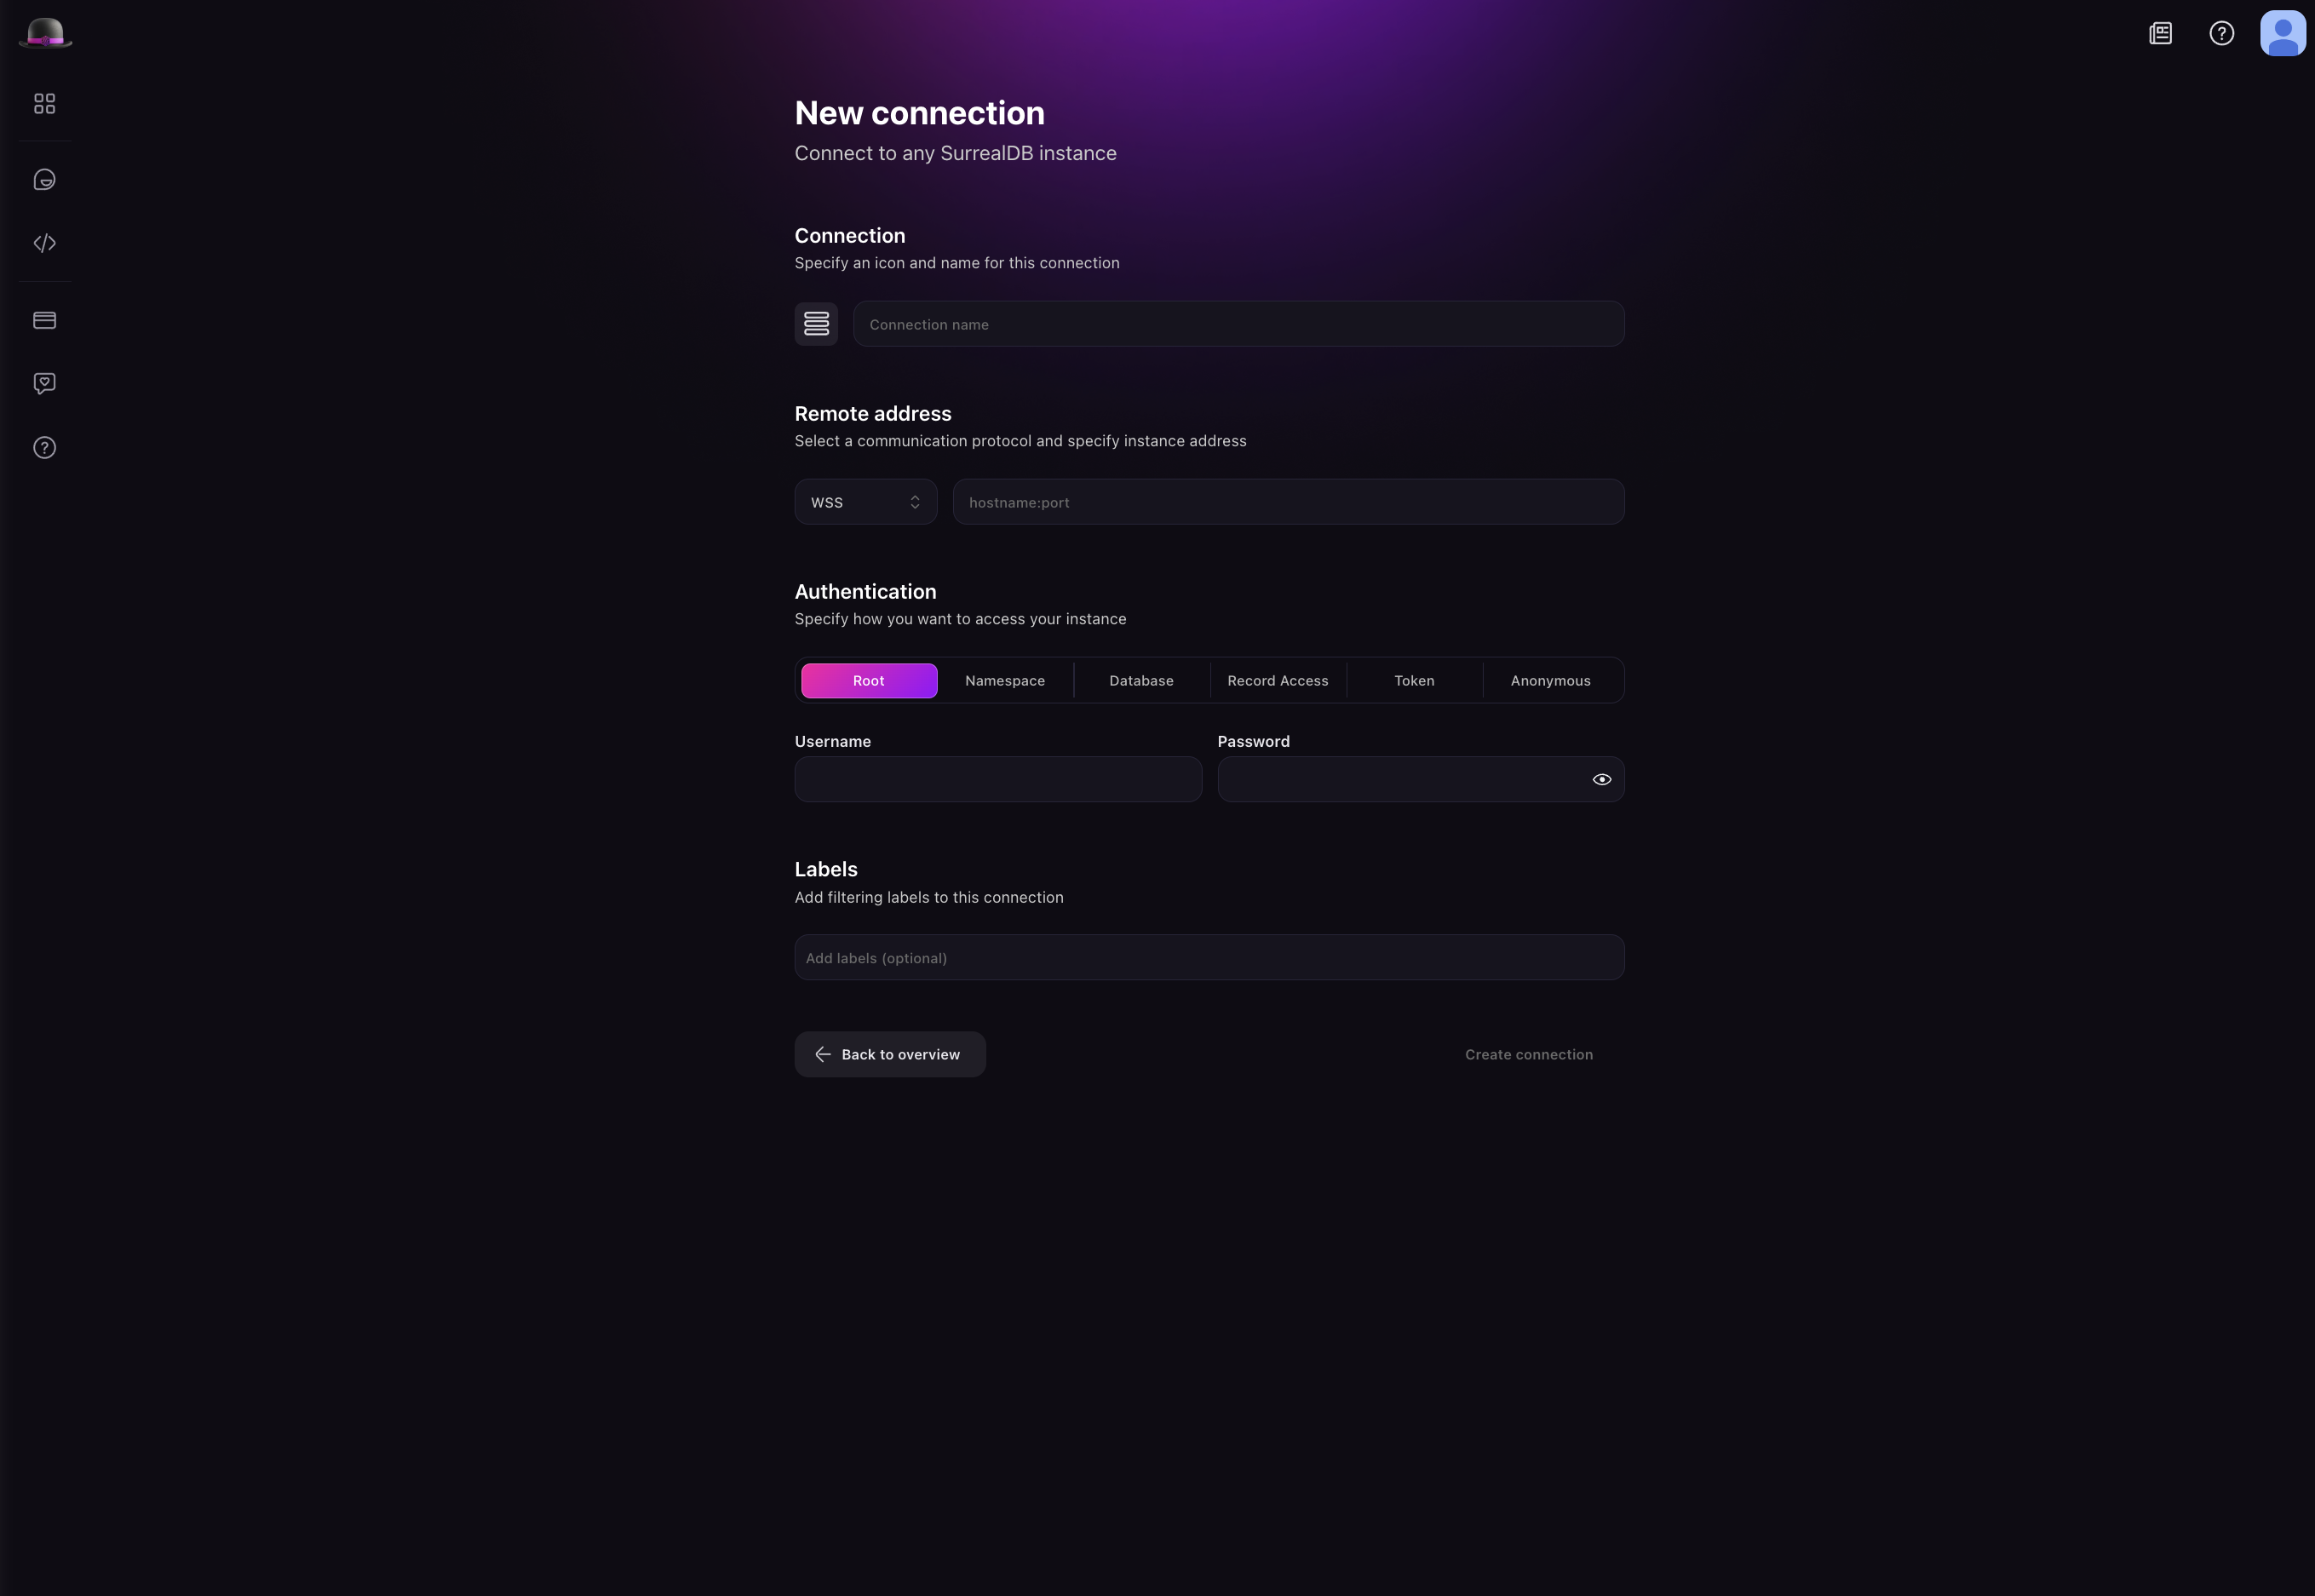
After filling in all fields, press Create to continue. If the connection was established successfully, you should see a green indicator next to the session name in the top left of the interface.
If the connection failed and you see a red indicator, make sure all your details are correct and update your connection accordingly. You can edit connection details again by expanding the connection list, and choosing Edit on your connection.
Using the Sandbox
As mentioned earlier, the sandbox environment is a special connection that allows you to test and learn SurrealQL. When active, the toolbar will provide some additional buttons useful for working with the sandbox environment.
Reset sandbox: This button will clear any records and schema you have configured in the sandbox. Use this button to start fresh or clear your sandbox environment.
Load demo dataset: This button will load an official demo dataset into the sandbox environment. This dataset contains a set of records and relations that you can explore and query.
Creating a SurrealDB Cloud connection
A SurrealDB Cloud connection allows you to connect to a SurrealDB Instance. This connection type is useful for working with production databases, and for using SurrealDB's cloud-native features. To make a SurrealDB Cloud connection, you will need to create a SurrealDB Cloud account. Learn more about SurrealDB Cloud in the SurrealDB Cloud documentation.
Navigation
On the left side of the interface you will find the navigation sidebar. This sidebar allows you to switch between different views in Surrealist. Each view is focused on a specific workflow for working with the database. If you are just getting started, we recommend one of the following:
Choose the Query view if you want to start writing your SurrealQL queries and execute them.
Choose the Explorer view if you want to explore existing records and the relations between them.
Additional views are available for managing your schema, writing stored procedures (functions), exploring API documentation, and more.
In addition to the different views, you can also find a button to open Surrealist Search, and a button to open the settings. Within the settings dialog you can also find an option to change the appearance of the navigation sidebar.
Video guide
After reading this guide, you can watch the following video which covers some features of Surrealist that can help you get started. This includes organising connections and connection groups, recordID inspector, editor shortcuts, surrealist search and useful settings.