Create an Instance
SurrealDB Cloud allows you to create a new Instance with a few clicks. You can create an Instance in your personal account or in an organization.
You can create an Instance in these steps from the overview:
Click on the Deploy Instance button. This will take you to the plan page where you can choose the plan you want to use for your Instance.
After you have selected your plan, configure your Instance. You can choose between the following Instance types:
General purpose: for production environments, data at scale, or professional use cases.
Burstable: for testing, starter projects, or for low-traffic applications. Clusters under heavy load may experience CPU throttling.
Free Tier: experience SurrealDB with a free Instance.
Input your Instance details.
- Region: the region you want to deploy your Instance in.
- AWS US East (N. Virginia)
- AWS US West (Oregon)
- AWS Europe (Ireland)
- SurrealDB version: the version of SurrealDB you want to use. Selecting the latest version is recommended but if you select a lower version, you will be able to upgrade to the latest in your Instance settings.
- Instance name: the name of the Instance.
You have the option to select Instance Data from the following options:
- Empty: this will create a new SurrealDB Instance with no data.
- Demo dataset: this option will populate your Instance with a demo dataset and some sample queries to get you started.
- Upload from file: this will allow you to upload a CSV file to your Instance.
- Restore from backup: this will allow you to restore a backup of an existing Instance.
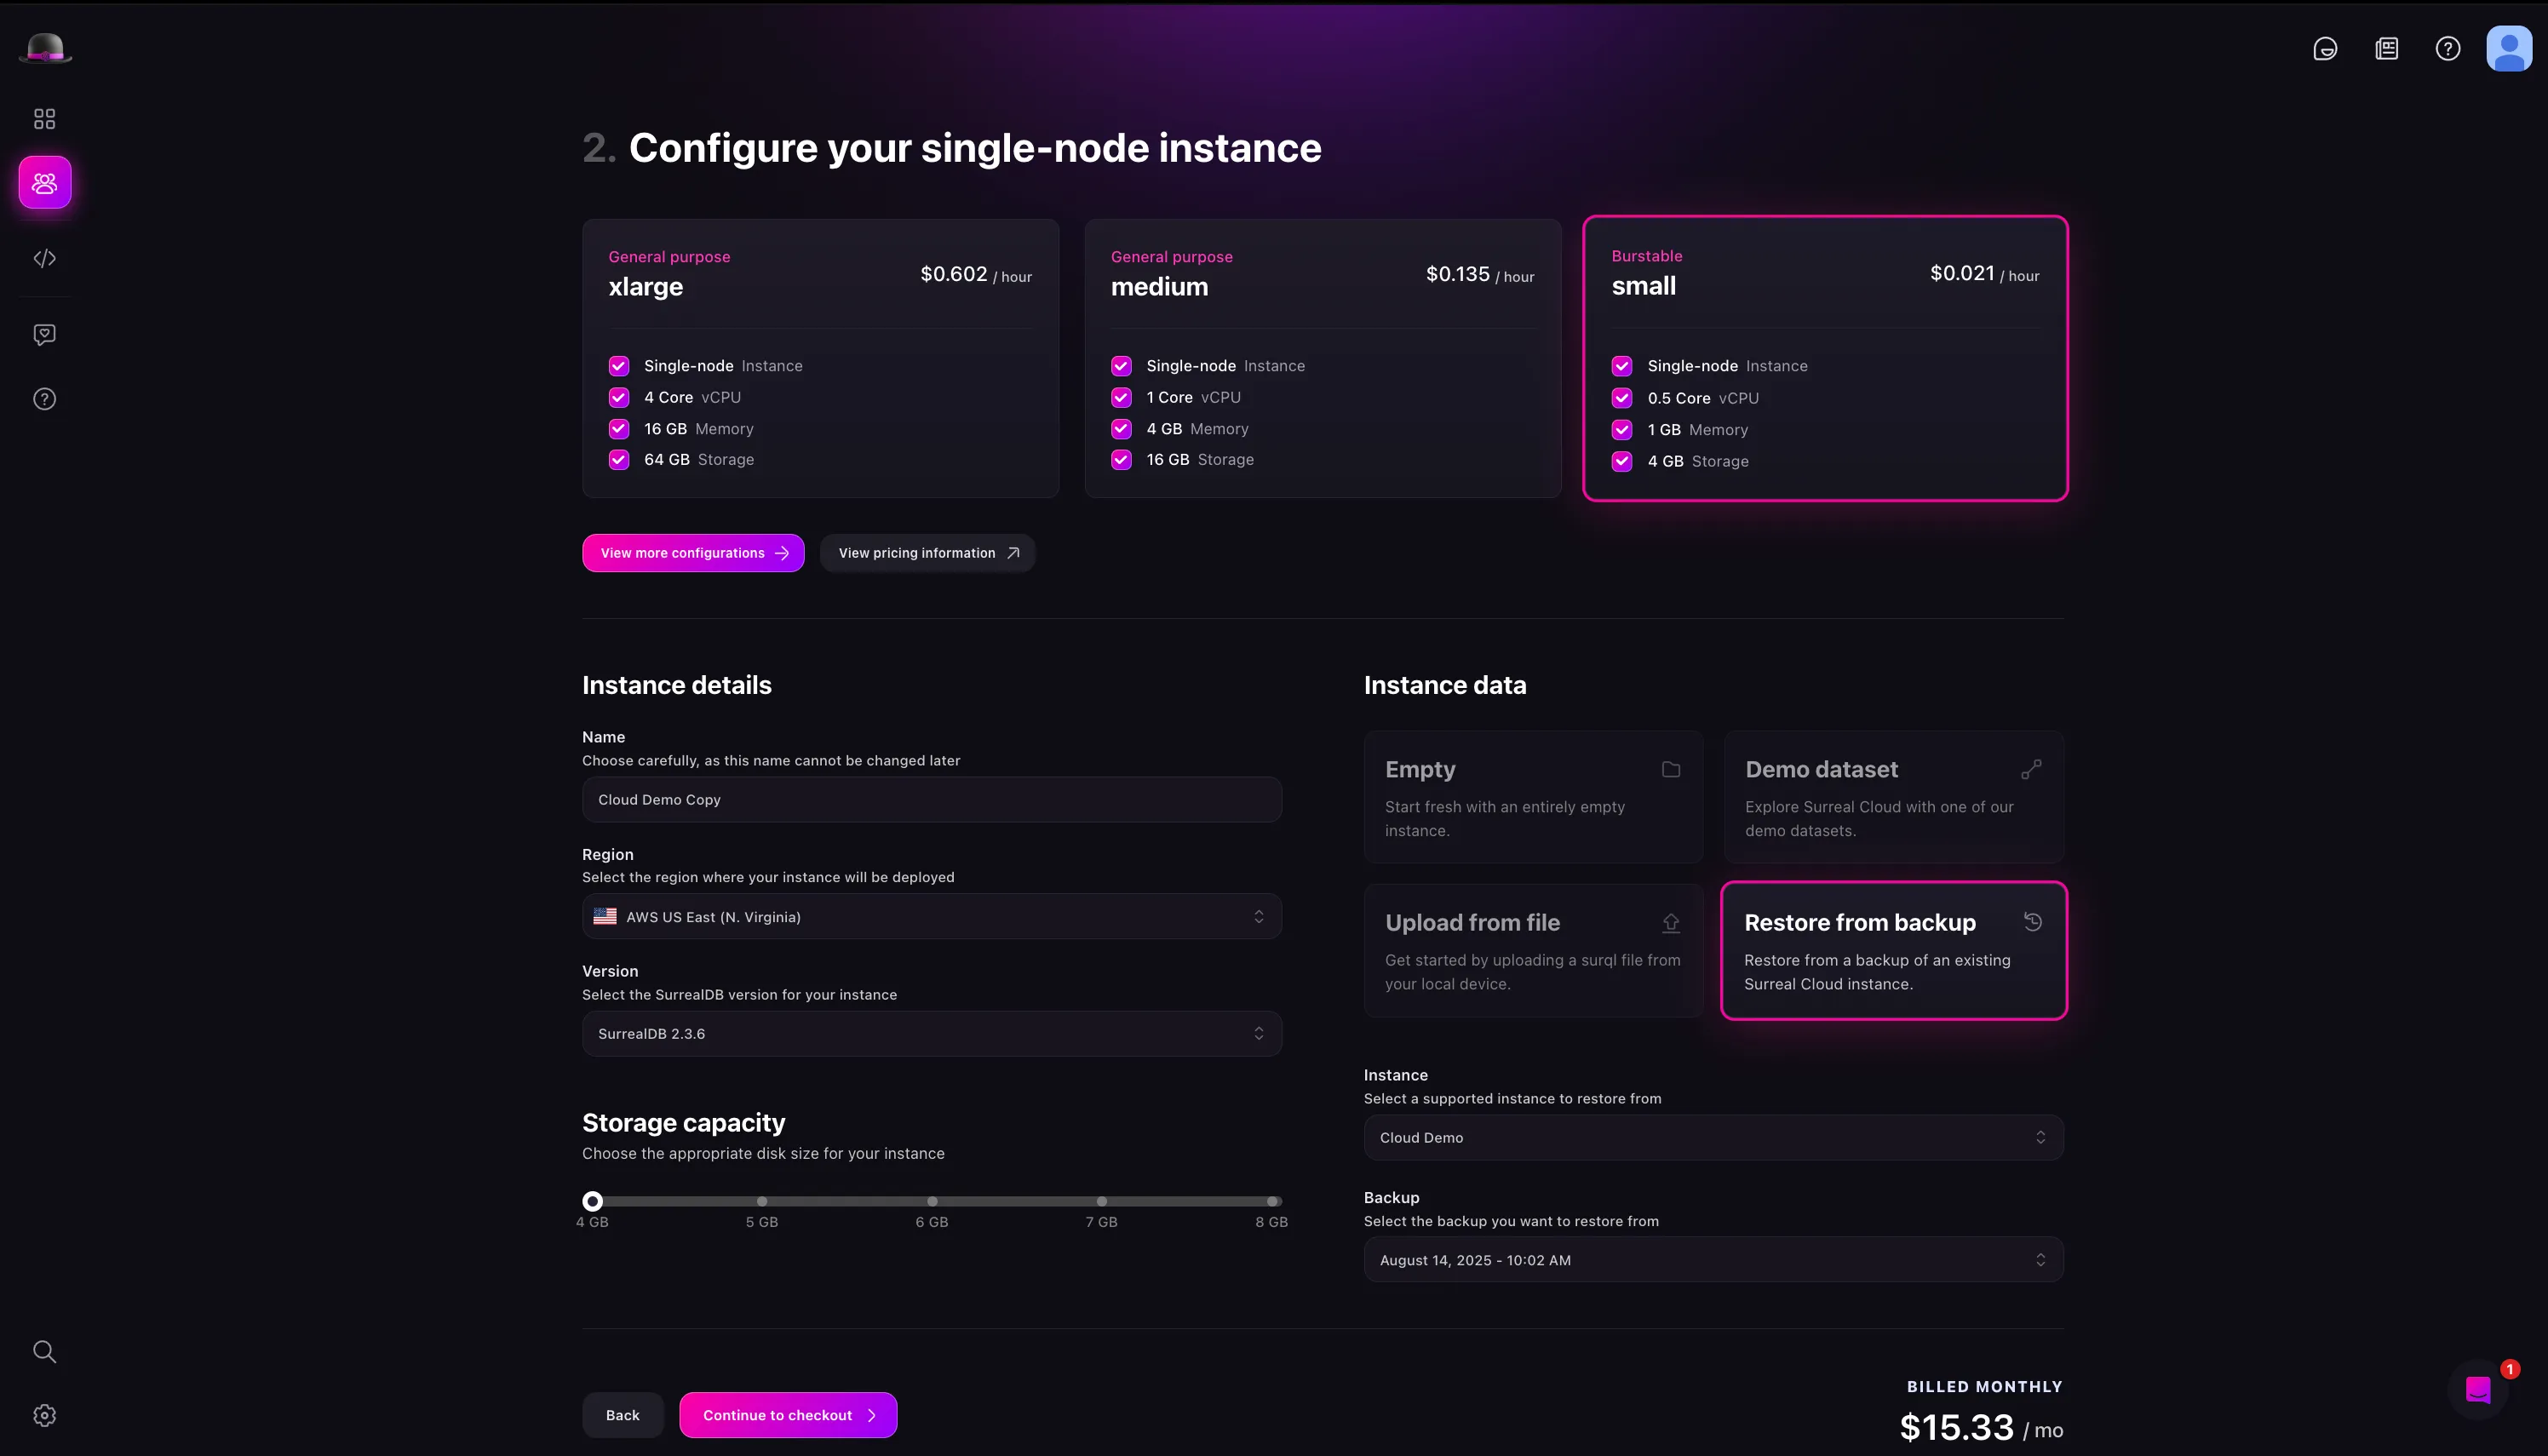
- In the Storage section, select storage capacity. This is the amount of storage you want to allocate to your Instance. Depending on the plan you have selected, you will have different options.
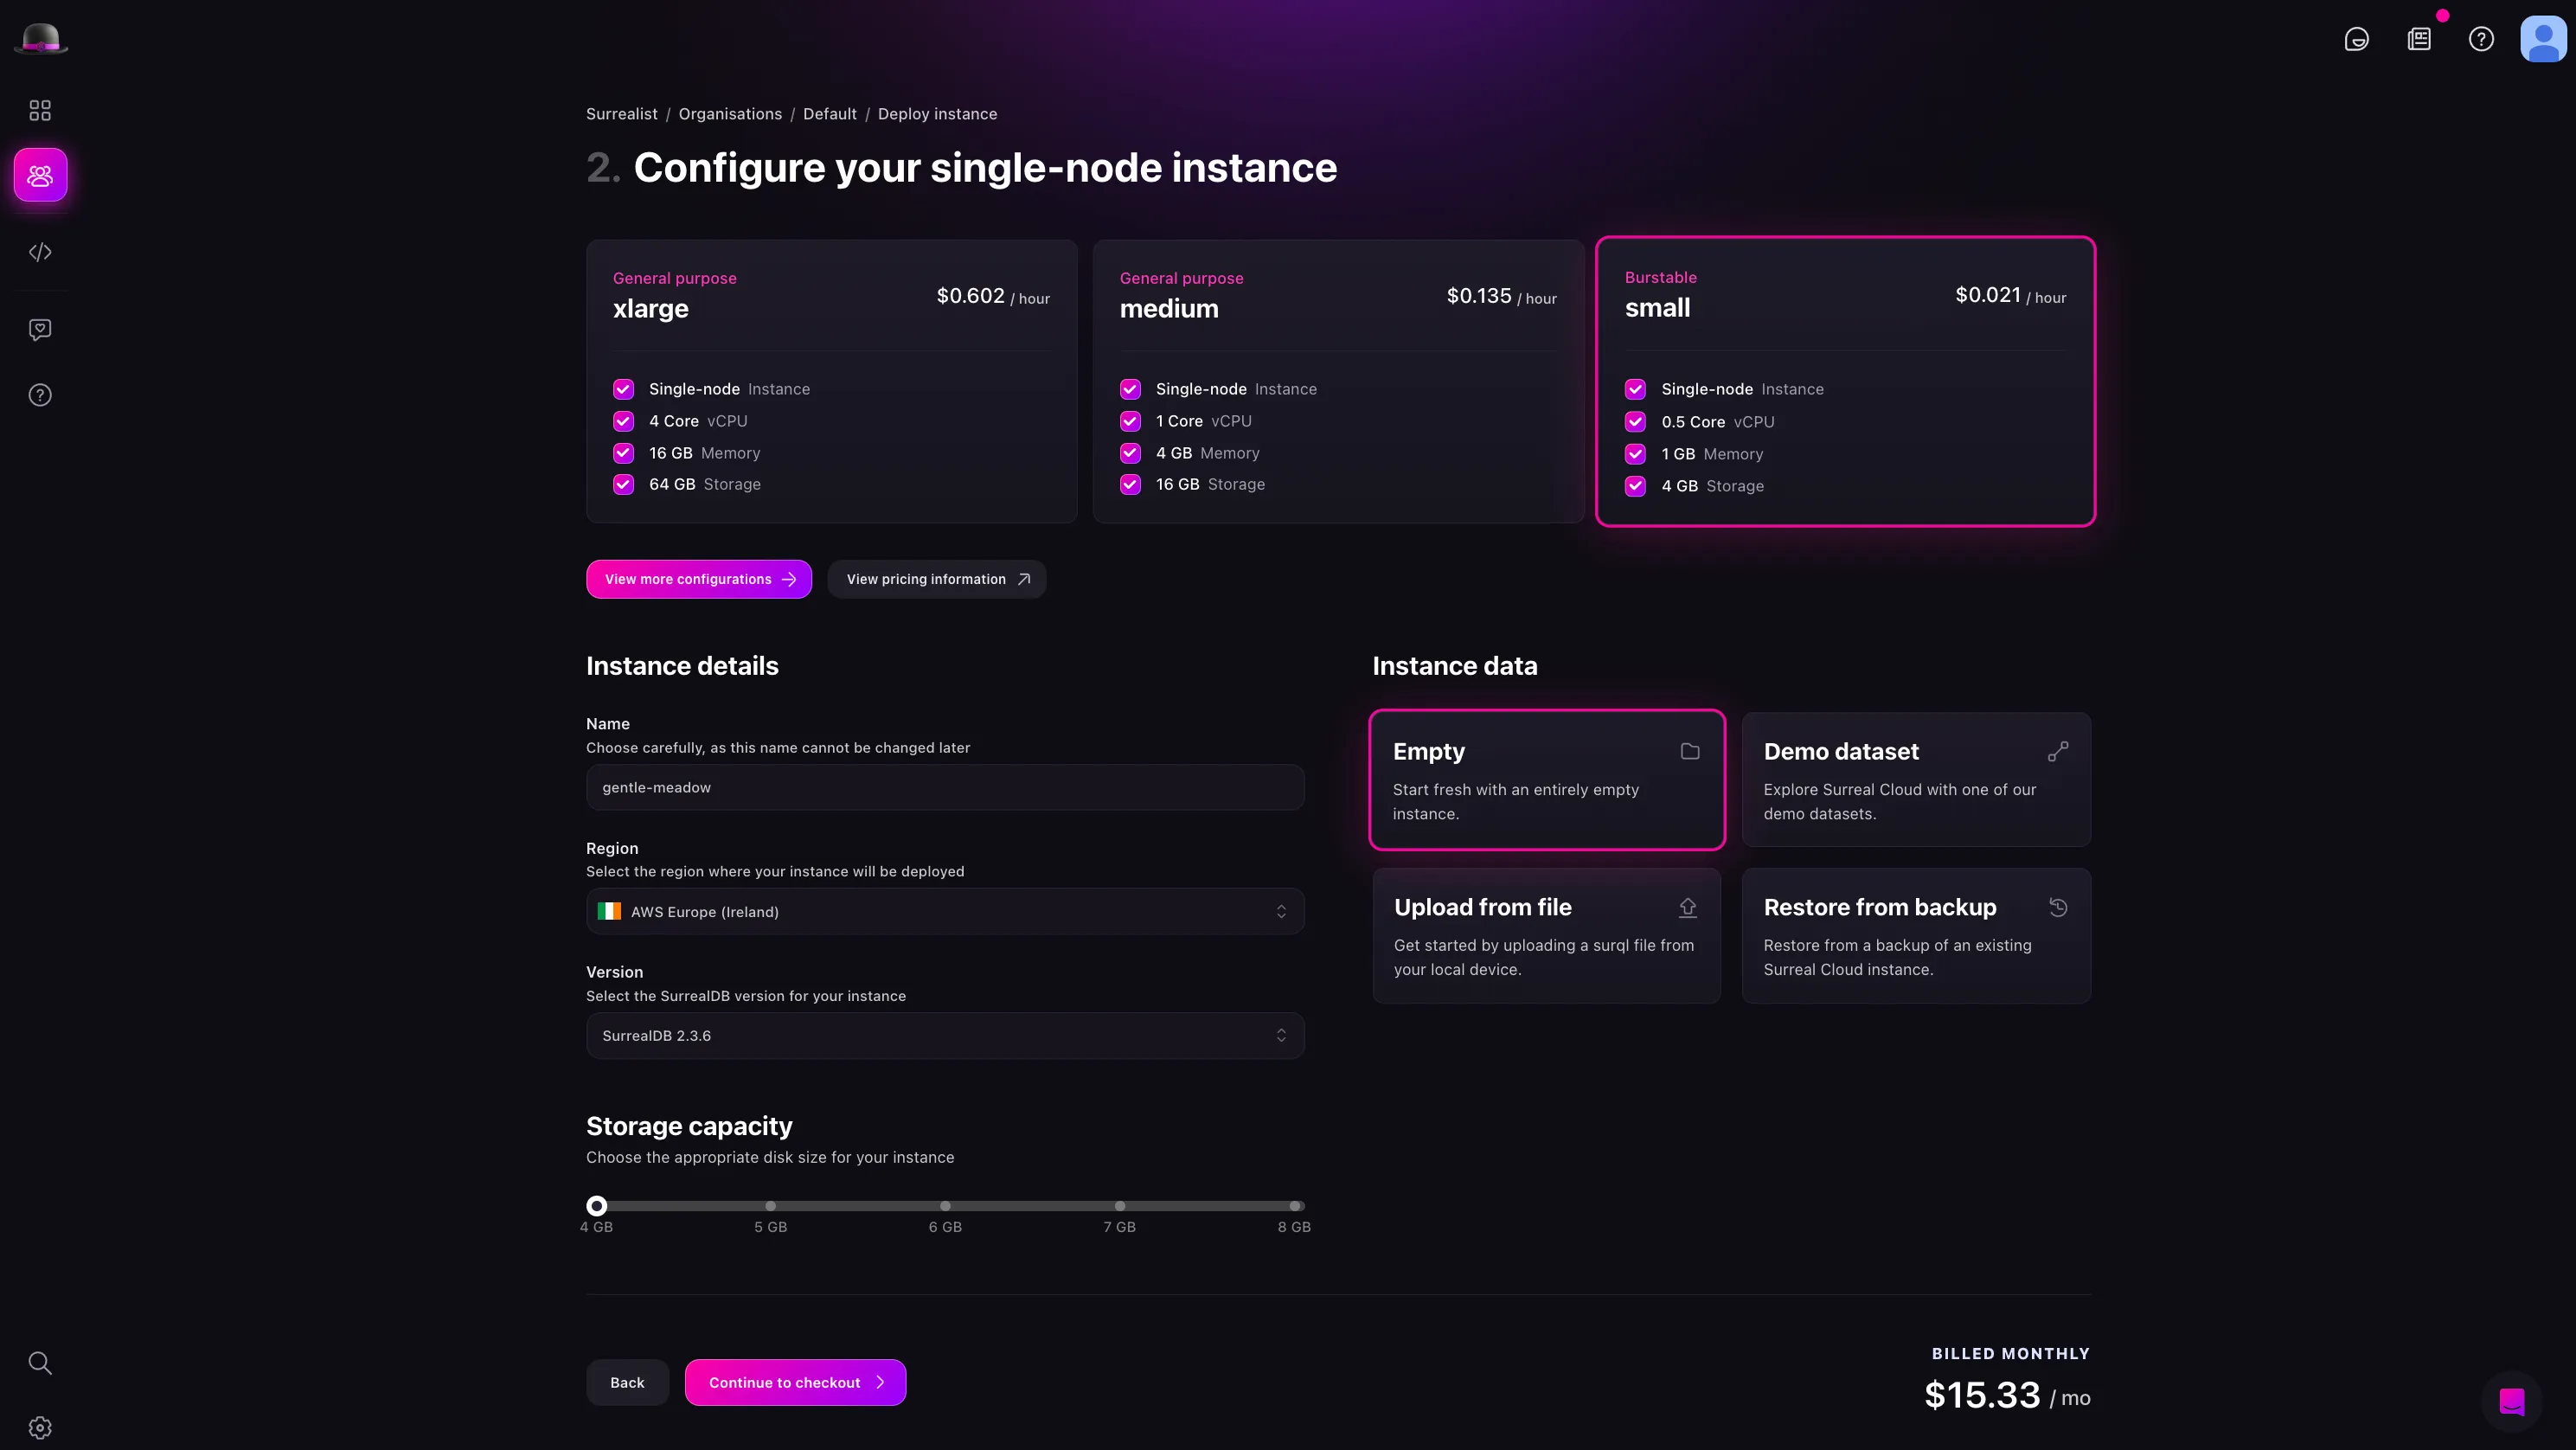
- After customising your Instance, click the Continue to checkout button. You’ll be taken to a checkout page where you can review your order. If you have selected a paid plan you will be prompted to enter your payment details.
After you have created an Instance, you can configure it to your needs. This includes changing the Instance type, compute nodes, and capabilities. To do this, click on the Configure Instance button on the Instance card; this will open up a configuration drawer.
Instance Configuration
In the Instance configuration drawer, you can change the following settings:
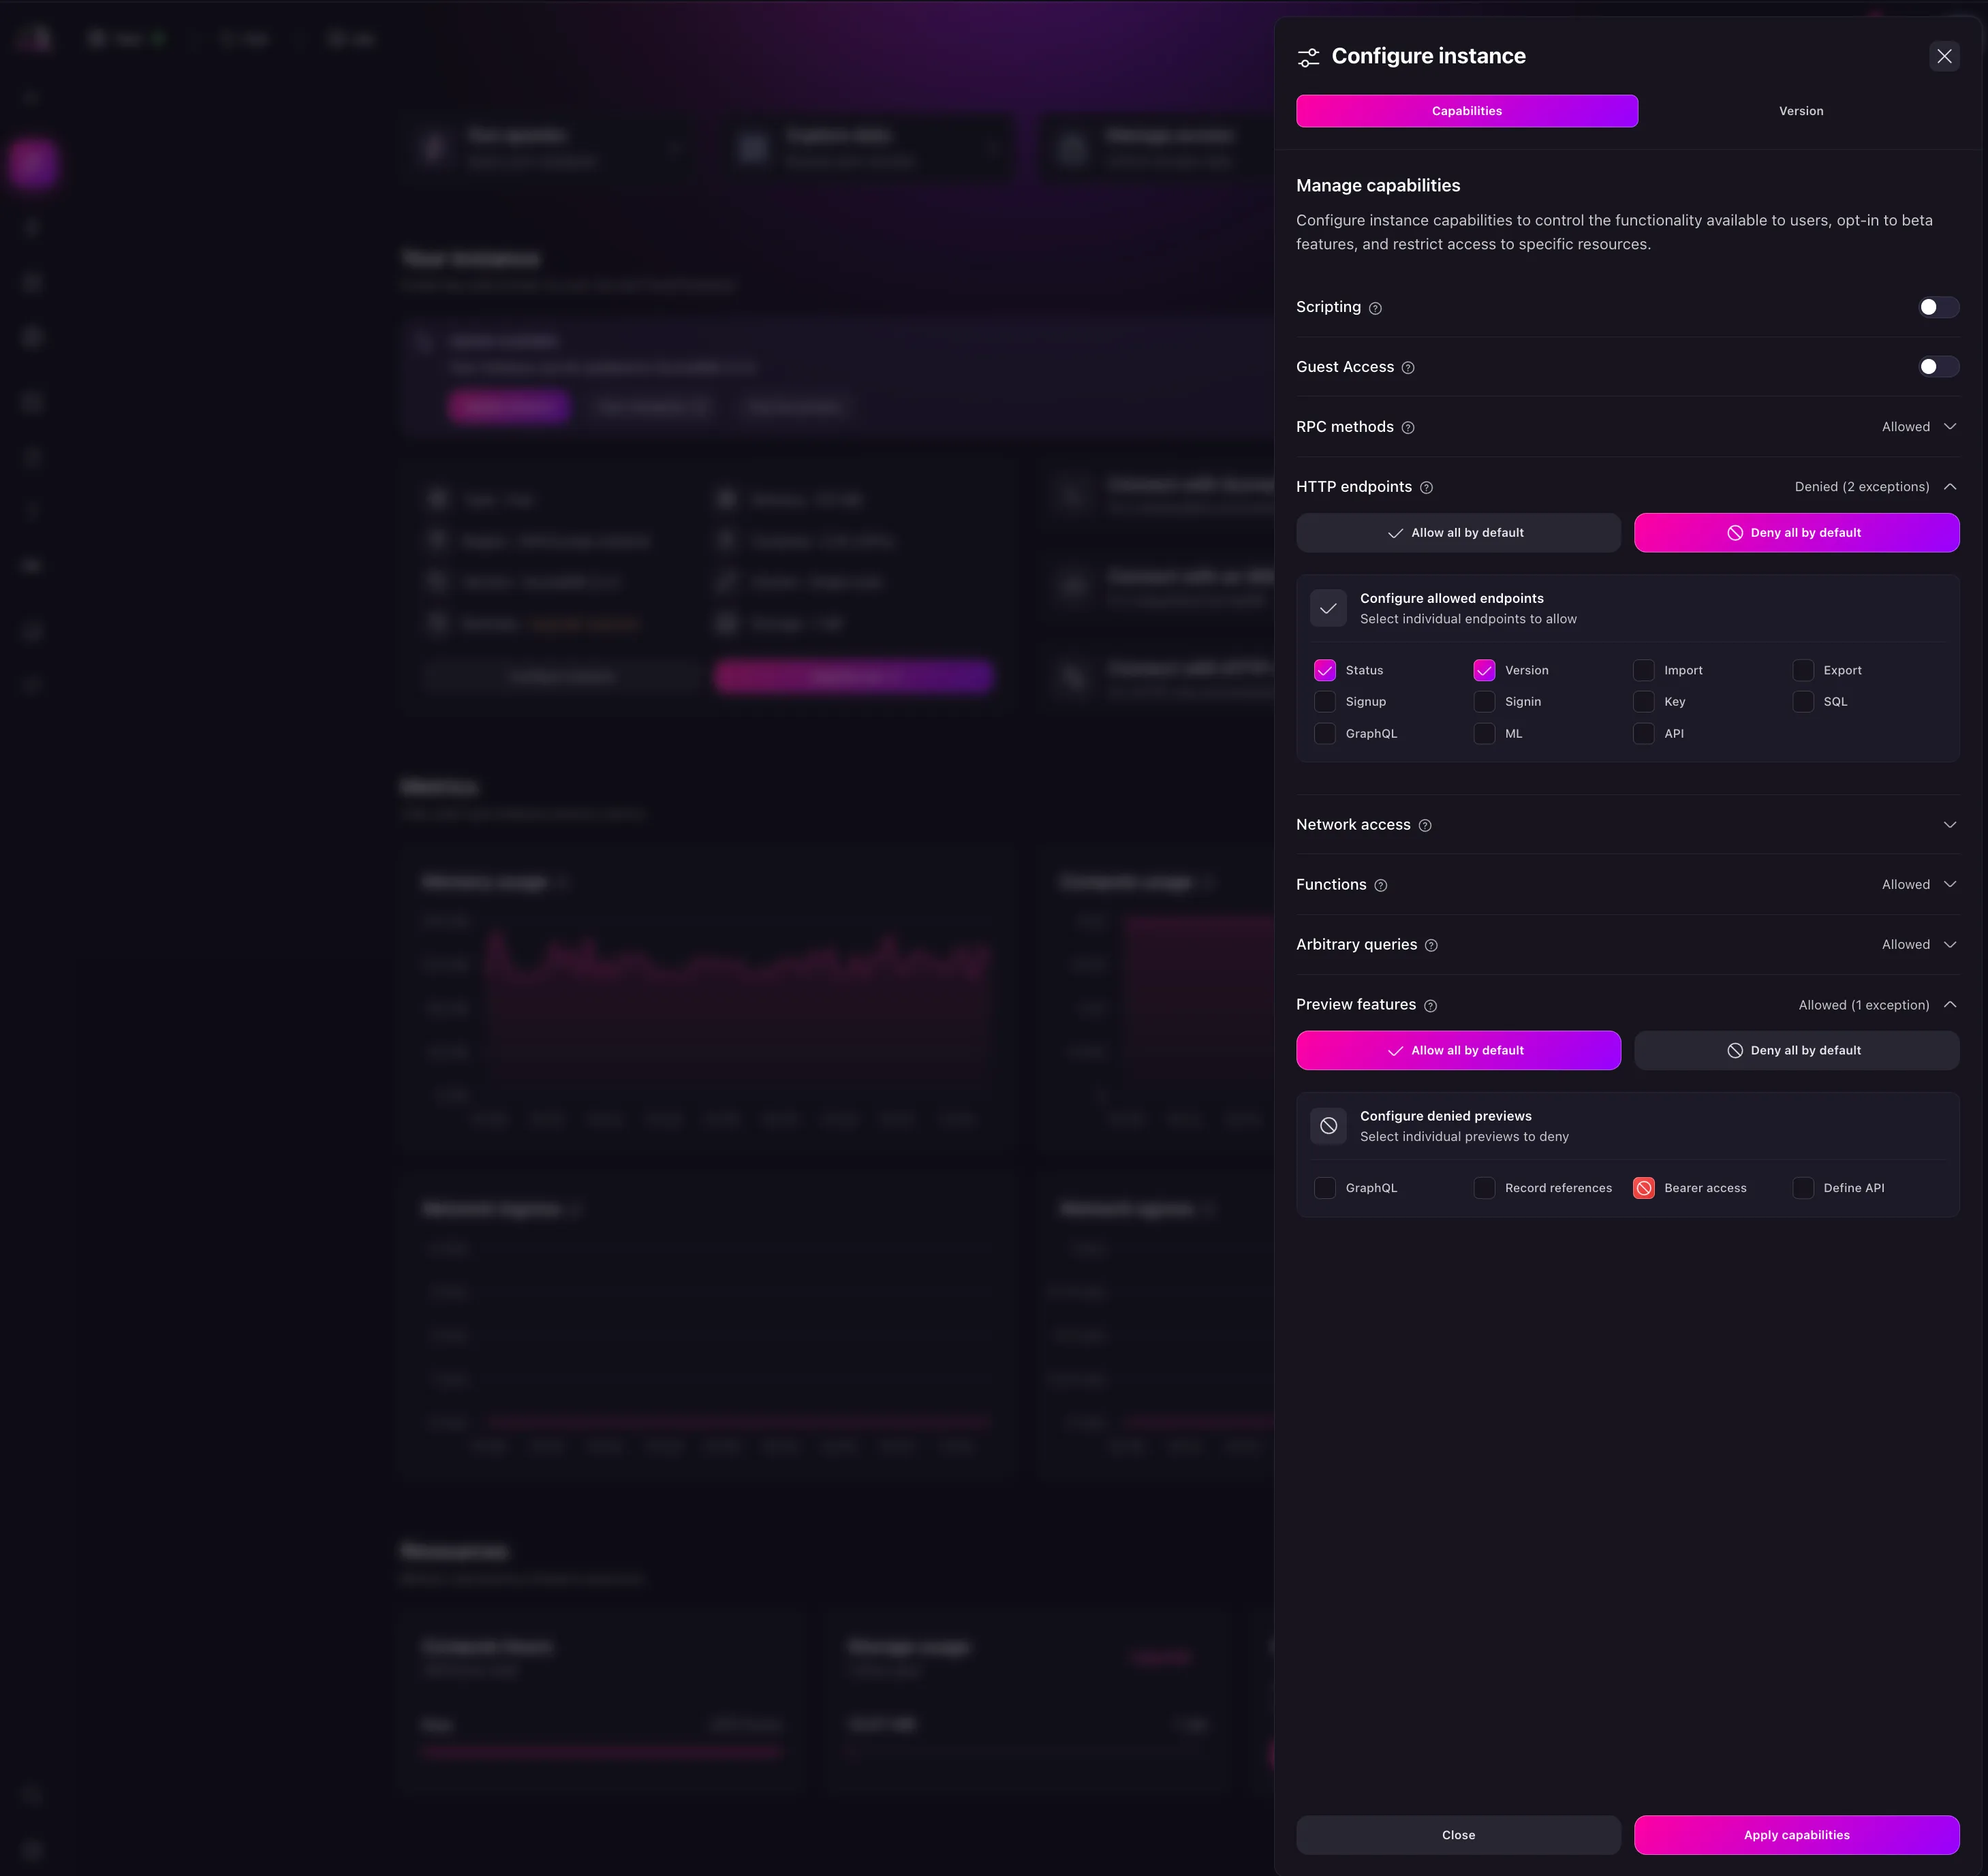
- Capabilities: the capabilities of the Instance, this controls the functionality available to users such as scripting, guest access, enabled endpoints for RPC and HTTP endpoints. You can also opt into beta features and restrict access to specific resources.
- Version: the version of SurrealDB that will be used for the Instance. If you a new version is available, you will be prompted to upgrade and also see the release notes.
Instance capabilities
The capabilities you choose will determine the features available to your Instance. This includes scripting, guest access, enabled endpoints for RPC and HTTP and more. For RPC methods, HTTP endpoints and preview features, you can leave pick one of the following options:
- Allow all by default: All endpoints are allowed by default and you can then select which endpoints to deny.
- Deny all by default: All endpoints are denied by default and you can then select which endpoints to allow.
On the other hand network access and functions provide a more granular control over the endpoints.
Learn more about configuring network access in the advanced topics section.
Upgrade Instance
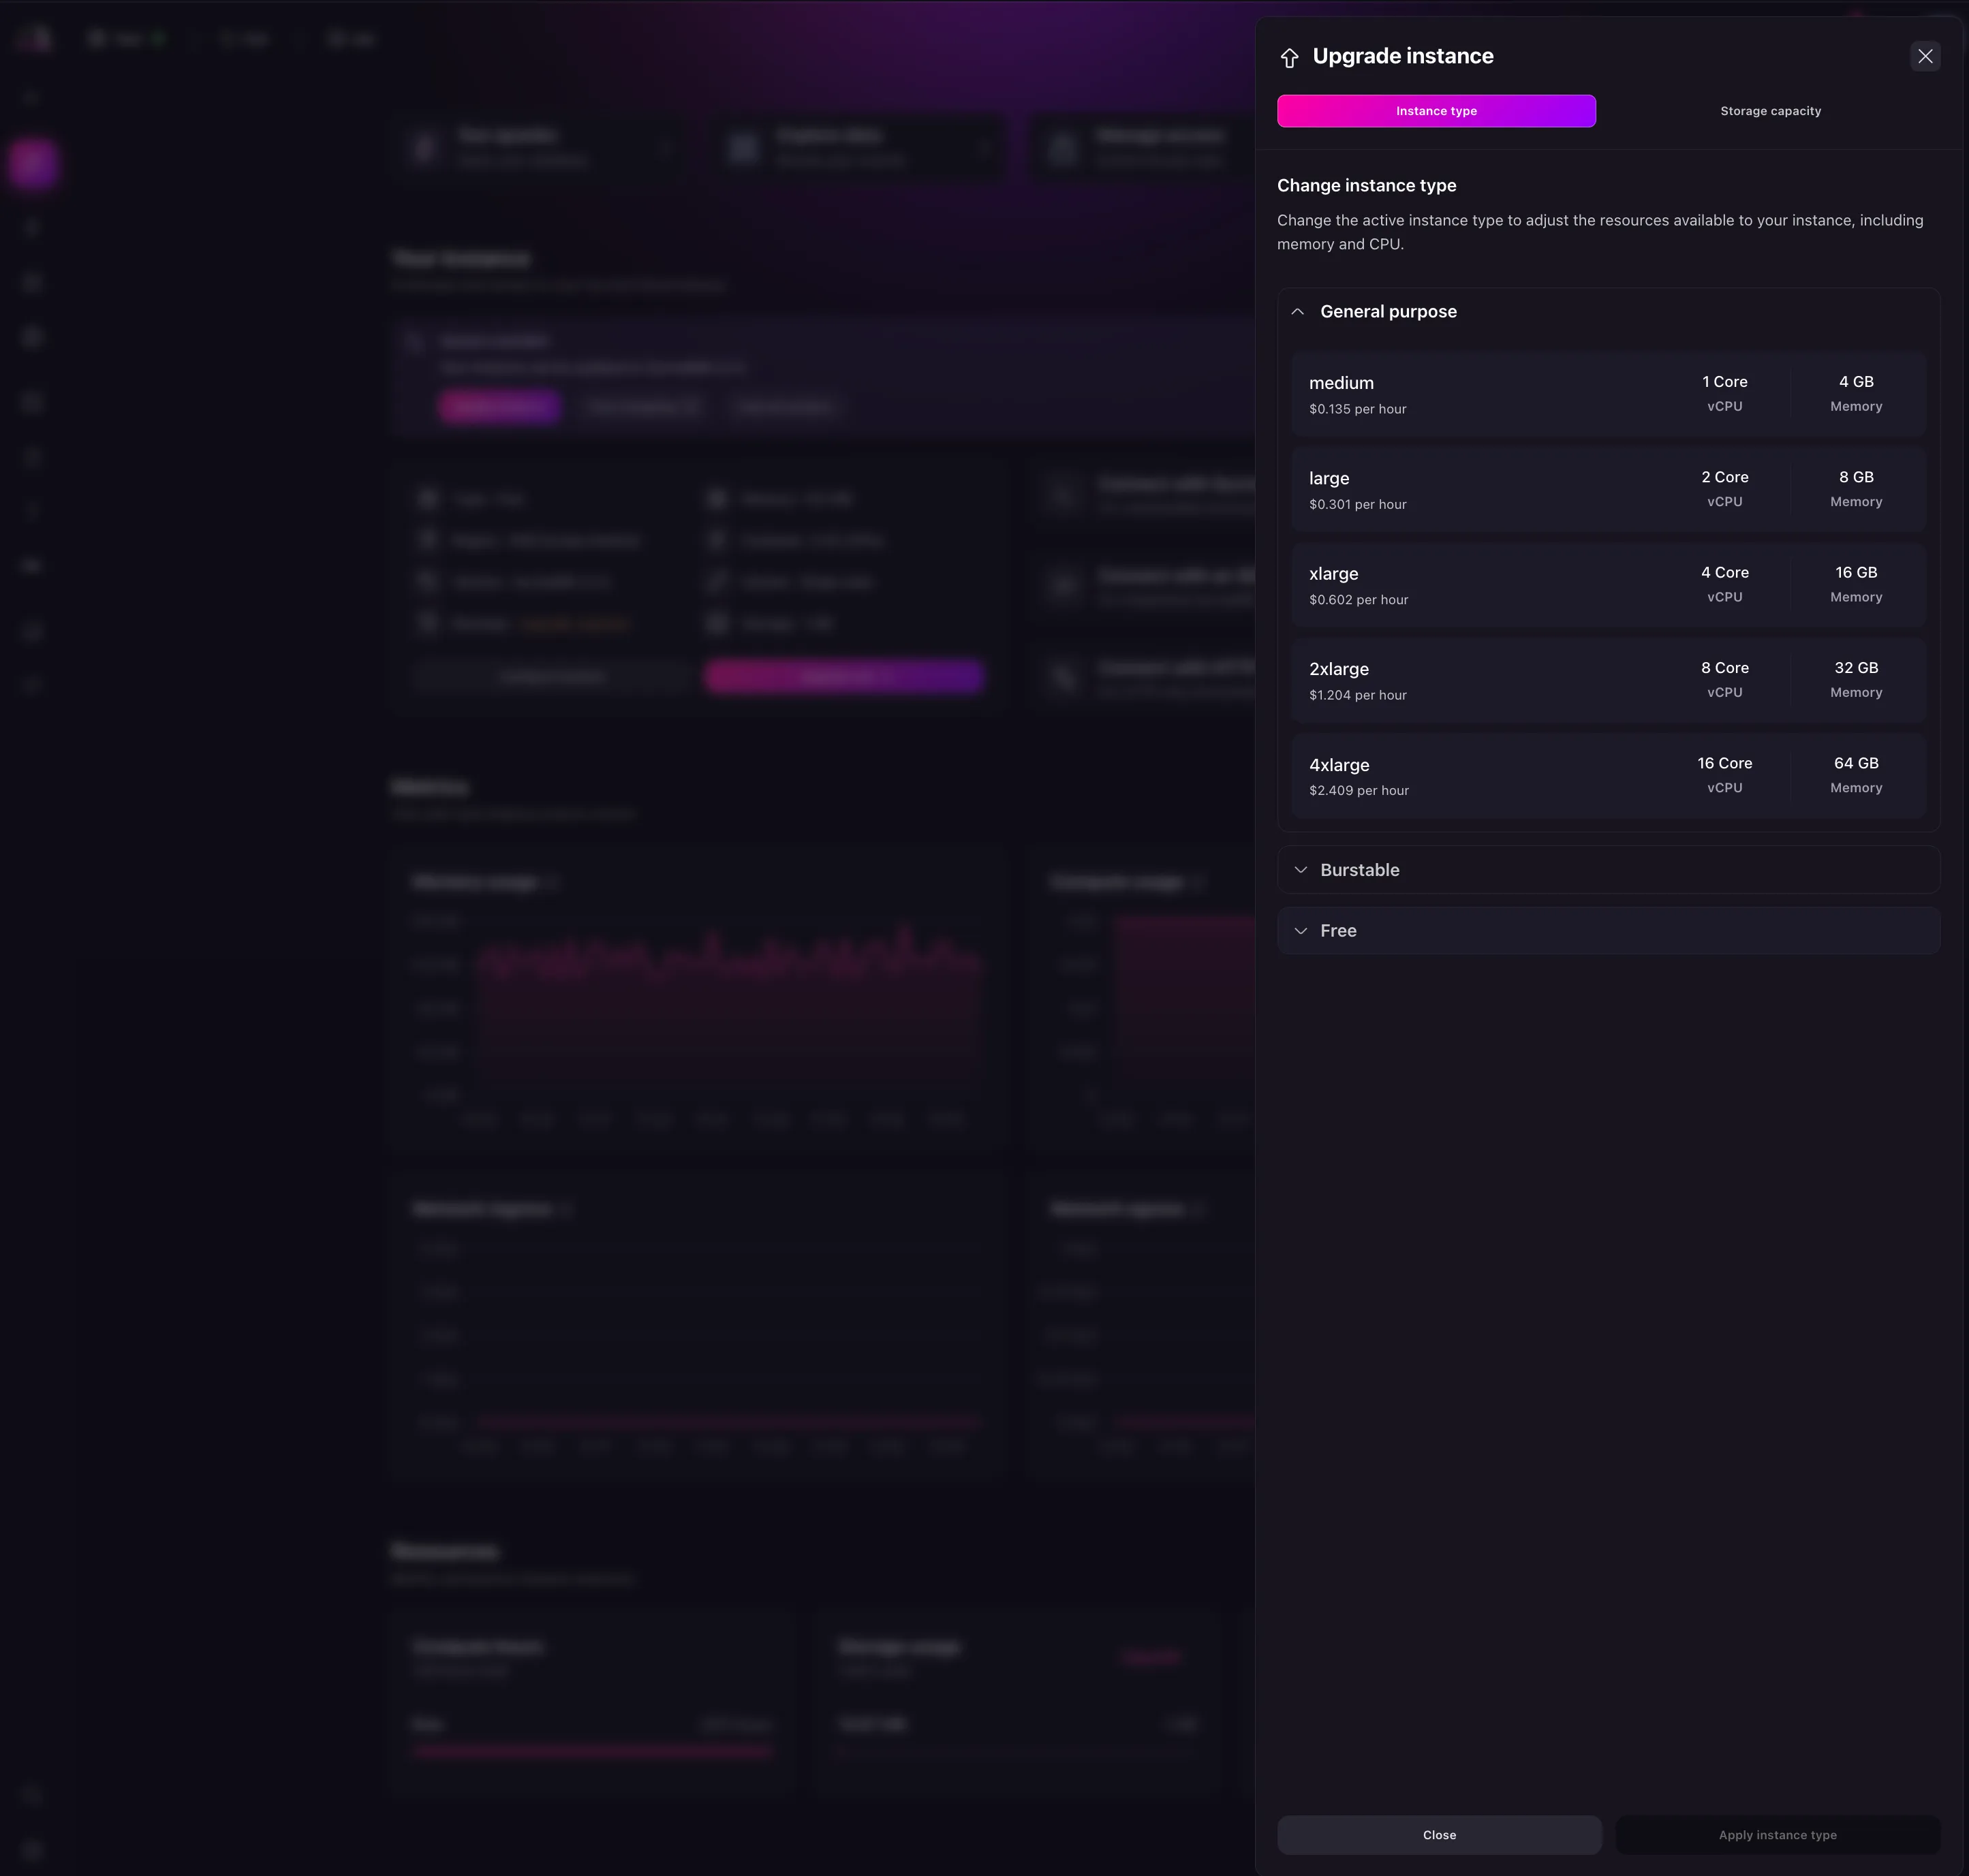
To upgrade an Instance, you can click the Upgrade now button on the Instance card. This will open a modal to select the tier you want to upgrade to as shown below. Depending on the tier you choose, and the resources you have allocated, you will be billed accordingly. When you click this button, you will have the following options:
- Instance type: the type of the Instance.
- Storage capacity: the size of the storage disk
Instance type
While the Instance type you choose will determine the compute and memory available to your Instance. Before you hit the limit of your current plan, you can upgrade your plan to a higher tier using this option.
First, select the Instance type option which will open a modal to select the tier you want to upgrade to as shown below. Depending on the tier you choose, and the resources you have allocated, you will be billed accordingly.
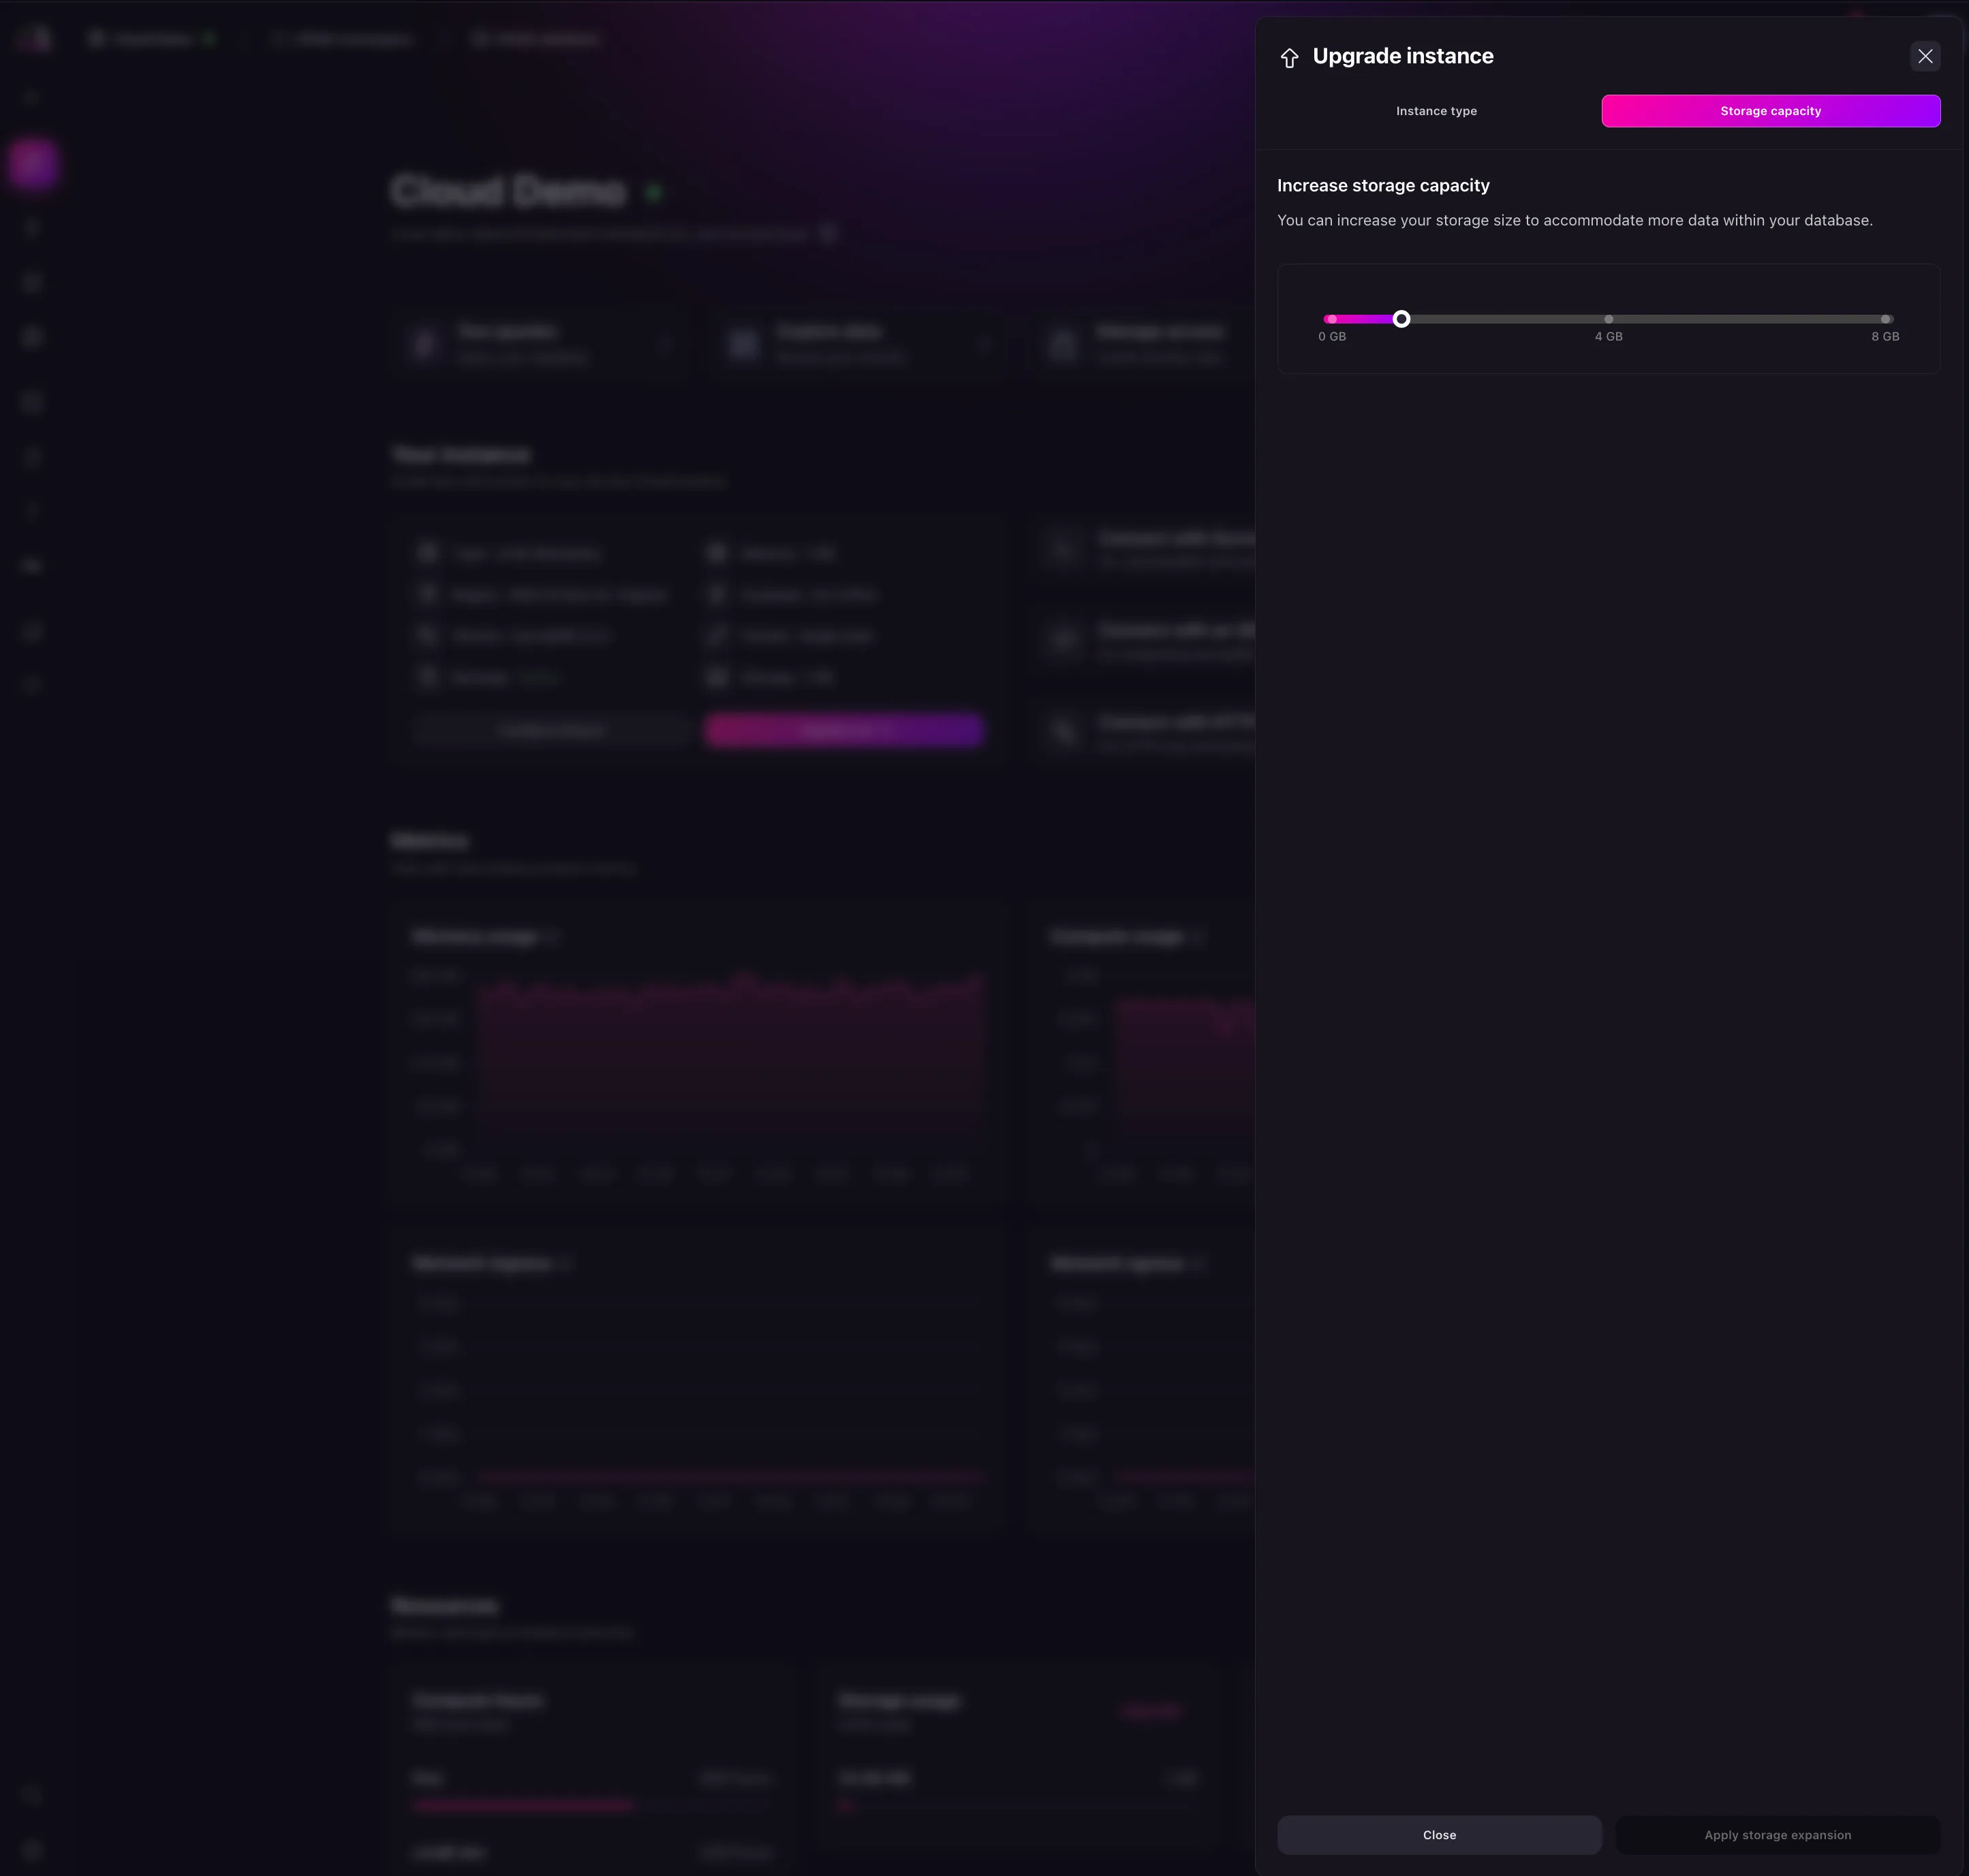
Storage capacity
The storage capacity is the amount of storage available to your Instance. This is used to store the database files and can be increased at any time. For paid plans, you can increase the storage capacity up to the maximum limit of your plan.
Storage expansion is unavailable for free instances. Upgrade your instance to unlock the ability to increase your storage capacity.
Pause or Delete an Instance
From the overview page, you can delete an Instance by clicking the option button on the Instance card and selecting Delete. This will bring up a confirmation modal. Once confirmed, the Instance will be deleted.
To pause an Instance, click the option button on the Instance card and select Pause. This will bring up a confirmation modal. Once confirmed, the Instance will be paused.

Next steps
Now that you have created an Instance, you can connect to your SurrealDB Cloud Instance.